


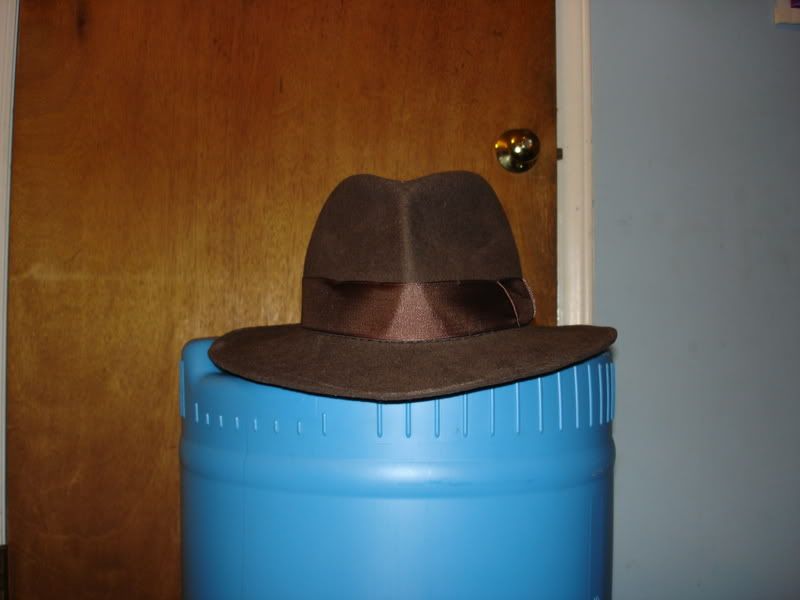
And my first Fedora!
I finally had an opportunity to get a $20 fedora from Burlington Coat Factory (the best that a teen without a job can get).
After about 2 weeks of shaping, I finally got the nerve to trim off the rolled brim. I'm going for mostly a Raiders look, with LC for the brim.
http://i3.photobucket.com/albums/y75/Cl ... C00468.jpg
http://i3.photobucket.com/albums/y75/Cl ... C00469.jpg
Any opinions or suggestions?
My BCF: A first step
Moderators: Indiana Jeff, Dalexs


-
Jaredraptor

- Dig Leader

- Posts: 559
- Joined: Tue Jun 05, 2007 9:37 pm
- Location: Tanis, Egypt.........okay, really Alexandria VA


-
Arkansas Russell

- Laboratory Technician

- Posts: 192
- Joined: Wed Jan 04, 2006 4:03 pm
- Location: The Arkansas Delta


-
Indyextra1
- Dig Worker

- Posts: 17
- Joined: Fri Jul 27, 2007 9:56 pm
Indyextra1 that’s a great start! If you have the time, you might want to try taking a BCF hat:
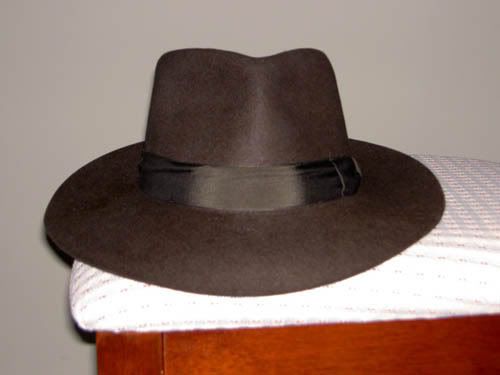
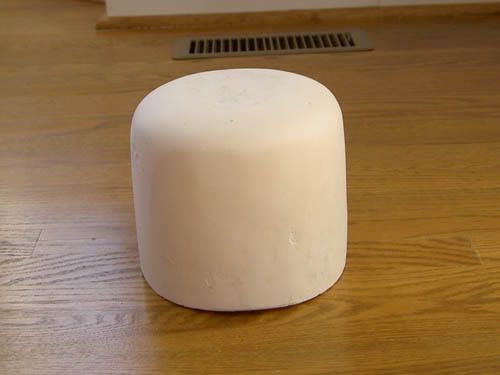
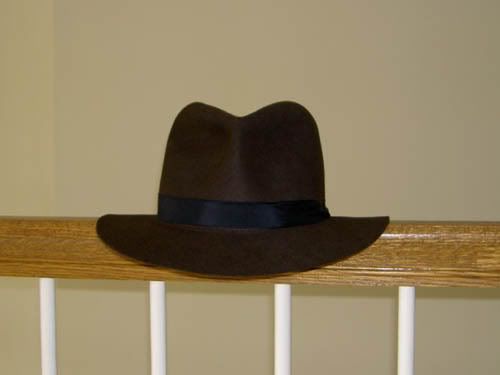
get some plaster and make one of these:
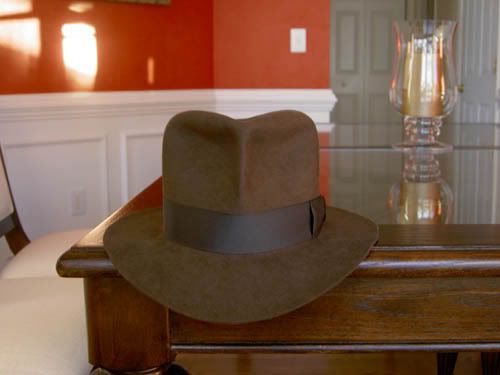
and then turn your hat into this:
You can dye the ribbon with brown RIT dye and that would take some of the sheen off and make the color more SA. Your total outlay for plaster, dye, and sandpaper for pouncing would be about $10.
No one would ever know that it’s a BCF; viewtopic.php?t=20934
- Mac
get some plaster and make one of these:
and then turn your hat into this:
You can dye the ribbon with brown RIT dye and that would take some of the sheen off and make the color more SA. Your total outlay for plaster, dye, and sandpaper for pouncing would be about $10.
No one would ever know that it’s a BCF; viewtopic.php?t=20934
- Mac
-
Indyextra1
- Dig Worker
- Posts: 17
- Joined: Fri Jul 27, 2007 9:56 pm
-
airforceindy

- Laboratory Technician
- Posts: 181
- Joined: Fri Aug 24, 2007 1:07 pm
- Location: Anchorage
Ditto there! I would love to see the progress on your block shape, if you've been able to do some work to it since the original posting of those pics. Fantastic job, Mac! What are you using as your mold, an older hat? Or something like the now infamous Tupperware block (I can't quite recall who was responsible for that...)? You mentioned doing a tutorial on block making; that would be of great use and interest to all of us, I'm sure, particularly those of us who are a little slower getting into the whole hat thing and strapped for cash at the same time!
Highest Regards, Andy
Highest Regards, Andy
I’m afraid RobbyT43 is right - the best advice is to save up for a decent hat! But do-it-your-selfers and guys on a tight budget (read college students) can get by with a little ingenuity.
I’m away from home for the weekend, so I can’t take any photos for a proper tutorial but I can put together a mini tutorial and TRY to explain what I’ve done.
First I used a CAD program to draw an oval. The oval needs to be about 1.5 inches longer than it is wide and the circumference needs to be about 1 cm more than your head measurement. The program you use must be able to give you precise measurements for the circumference so you can scale it accurately and keep the 1.5 difference between width and length. I’m sure there are free programs available that can do this, but I used a simple (and obsolete but very easy to use) commercial program call Quickcad.
For a size 57 [57 cm circumference head; size 7 1/8], the width will be about 6.5 inches, and the length will be about 8 inches (note the 1.5 inch difference). For the width and length, draw a horizontal line 6.5 inches long and bisect with a 8 inch line to form a “+” shape. Then draw an oval over the “+”. Then scale the oval so that it is exactly 58 cm.
So the rule is (for a regular oval head), make the oval 1.5 wider than long, and make the circumference of the oval 1 cm more than your head size.
Print out your oval. Make sure that, in your printer preferences dialog, scaling is turned off, so that the oval will print to precisely the dimensions you want. Measure the print out height and width carefully to double check.
OK, if you’ve read this far and you’re not asleep, you’re ready make a form for your mold.
Carefully cut out your oval precisely on the line. Trace the cut on a piece of thick cardboard or flat styrofoam. Styrofoam is probably better, because it’s water proof. Cut out your tracing on the thicker material. I used cardboard, so I wrapped it with packing tape so that the water that drains from the plaster would not turn the cardboard into mush.
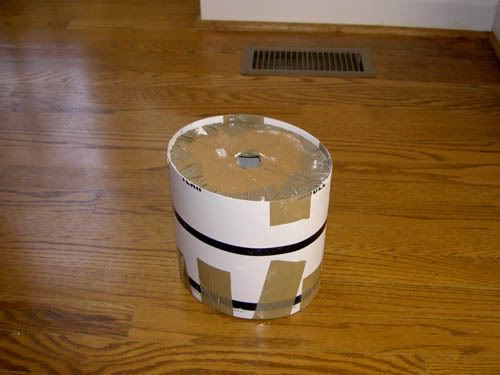
Once you have this new oval cut, you then wrap it with thick plastic to form a mold. I used a large “For Sale” sign, $2 at Walmart. It’s thick and will resist bending under the weight of wet plaster. Cut a strip about 7 inches in height and long enough in length to wrap around your oval.
Now, wrap the plastic around the oval and tape it up. Scribe a line on the inside of the plastic, 6 inches up from the bottom. This is how much plaster will go into the form.
For a size 57 block, you will need eight to ten pounds of plaster. Mix up the plaster and pour it in the block up to the fill line. Remember that extra cardboard oval; this is where you use it. Place it in the top of the form to stiffen the whole thing and keep the side walls straight. Here’s a picture:
Wait a couple of days to make sure it dries completely; it should look like this:
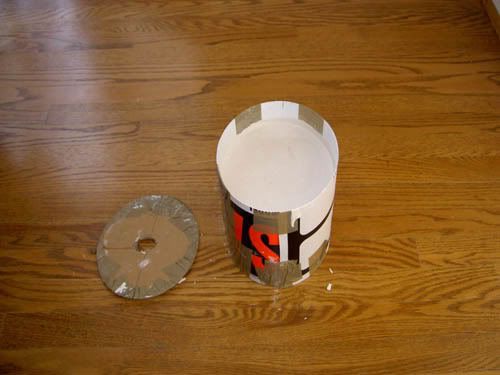
Then cut away the plastic (or carefully remove it to make another block with!). You should have a straight sided oval cylinder, six inches high.
Now start sanding until it looks like an Indy block (plenty of photo around here). I use an orbital sander; starving college students can use a block of wood wrapped in 36 grit sandpaper. Either way, this is the hard part!
Eventually it will look like this:
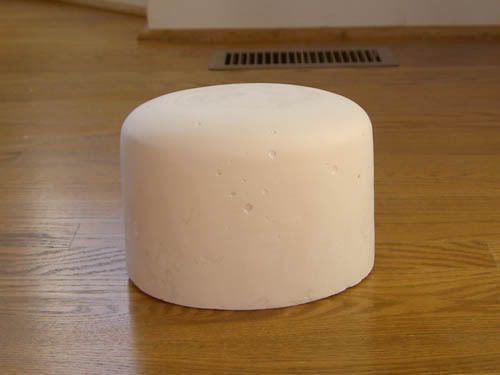
These still need a little work.
Remember, its plaster so don’t get it wet when you pull a hat over it. I wrap a plastic grocery bag around it. There are plenty of hat blocking tutorials around here.
OK that’s it! Post picture of your block when you’re done.
- Mac
I’m away from home for the weekend, so I can’t take any photos for a proper tutorial but I can put together a mini tutorial and TRY to explain what I’ve done.
First I used a CAD program to draw an oval. The oval needs to be about 1.5 inches longer than it is wide and the circumference needs to be about 1 cm more than your head measurement. The program you use must be able to give you precise measurements for the circumference so you can scale it accurately and keep the 1.5 difference between width and length. I’m sure there are free programs available that can do this, but I used a simple (and obsolete but very easy to use) commercial program call Quickcad.
For a size 57 [57 cm circumference head; size 7 1/8], the width will be about 6.5 inches, and the length will be about 8 inches (note the 1.5 inch difference). For the width and length, draw a horizontal line 6.5 inches long and bisect with a 8 inch line to form a “+” shape. Then draw an oval over the “+”. Then scale the oval so that it is exactly 58 cm.
So the rule is (for a regular oval head), make the oval 1.5 wider than long, and make the circumference of the oval 1 cm more than your head size.
Print out your oval. Make sure that, in your printer preferences dialog, scaling is turned off, so that the oval will print to precisely the dimensions you want. Measure the print out height and width carefully to double check.
OK, if you’ve read this far and you’re not asleep, you’re ready make a form for your mold.
Carefully cut out your oval precisely on the line. Trace the cut on a piece of thick cardboard or flat styrofoam. Styrofoam is probably better, because it’s water proof. Cut out your tracing on the thicker material. I used cardboard, so I wrapped it with packing tape so that the water that drains from the plaster would not turn the cardboard into mush.
Once you have this new oval cut, you then wrap it with thick plastic to form a mold. I used a large “For Sale” sign, $2 at Walmart. It’s thick and will resist bending under the weight of wet plaster. Cut a strip about 7 inches in height and long enough in length to wrap around your oval.
Now, wrap the plastic around the oval and tape it up. Scribe a line on the inside of the plastic, 6 inches up from the bottom. This is how much plaster will go into the form.
For a size 57 block, you will need eight to ten pounds of plaster. Mix up the plaster and pour it in the block up to the fill line. Remember that extra cardboard oval; this is where you use it. Place it in the top of the form to stiffen the whole thing and keep the side walls straight. Here’s a picture:
Wait a couple of days to make sure it dries completely; it should look like this:
Then cut away the plastic (or carefully remove it to make another block with!). You should have a straight sided oval cylinder, six inches high.
Now start sanding until it looks like an Indy block (plenty of photo around here). I use an orbital sander; starving college students can use a block of wood wrapped in 36 grit sandpaper. Either way, this is the hard part!
Eventually it will look like this:
These still need a little work.
Remember, its plaster so don’t get it wet when you pull a hat over it. I wrap a plastic grocery bag around it. There are plenty of hat blocking tutorials around here.
OK that’s it! Post picture of your block when you’re done.
- Mac
-
Rusty Jones

- Archaeologist

- Posts: 390
- Joined: Sat Aug 27, 2005 11:33 am
- Location: Raleigh, NC, Running from the Havitos (my (ex)girlfriends' parents)
-
Indyextra1
- Dig Worker
- Posts: 17
- Joined: Fri Jul 27, 2007 9:56 pm
Indyextra1 let me give you a word of caution. When you reblock a tapered hat, unless you have a very stretchy felt (unlikely), you are probably going to have to either trade crown height for brim width or vise versa. The extra material to fill the more full block shape must come from somewhere. You may have to settle for a slightly lower crown and/or a slightly narrower brim, but you will gain a much more straight sided bash. Here’s a very extreme example:
Prior to reblock-
Lost brim-
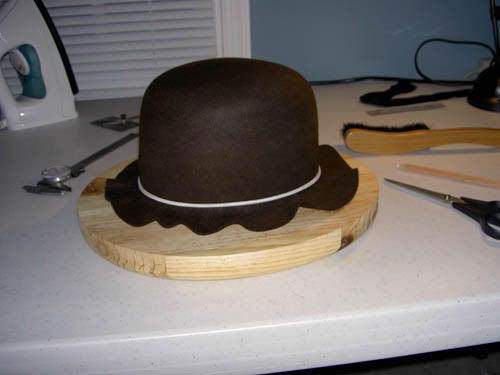
Derby, anyone?
Now don’t let this scare you, as I said this is an extreme example. This little BCF hat, in the first picture, is a 5 inch open crown, 2 3/8 inch brim, with a 9/10 inch wide ribbon. Very tiny. Judging by your picture, your brim won’t be anywhere near as short, but you may need to settle for a slightly lower crown.
For all of you BCF brown fedora hunters, if you intend to reblock the hat, get the largest hat you can possibly find so you have some leeway with the brim. Look at the first two hat photos that I posted in this thread, not the two directly above, but farther up the page. The brim in the AFTER photo has not been trimmed at all from the BEFORE photo. The brim simply disappeared into the fuller, less tapered crown.
-Mac
Prior to reblock-
Lost brim-
Derby, anyone?
Now don’t let this scare you, as I said this is an extreme example. This little BCF hat, in the first picture, is a 5 inch open crown, 2 3/8 inch brim, with a 9/10 inch wide ribbon. Very tiny. Judging by your picture, your brim won’t be anywhere near as short, but you may need to settle for a slightly lower crown.
For all of you BCF brown fedora hunters, if you intend to reblock the hat, get the largest hat you can possibly find so you have some leeway with the brim. Look at the first two hat photos that I posted in this thread, not the two directly above, but farther up the page. The brim in the AFTER photo has not been trimmed at all from the BEFORE photo. The brim simply disappeared into the fuller, less tapered crown.
-Mac
-
Indyextra1
- Dig Worker
- Posts: 17
- Joined: Fri Jul 27, 2007 9:56 pm