


First we take out the liner – this one was glued in and fortunately not much glue was used.
http://i622.photobucket.com/albums/tt30 ... ol_04s.jpg
Next we get it good and wet, we’ll be reblocking it so give it a soaker. I used the bathtub method.
It’s on the block let’s let ‘er dry.

While it’s doing that I’ll stain my deck (you can skip this step, it’s called multitasking. Instead I recommend watching an Indy flick or two).
It’s dry so now we give it a little bash, I’m going for the CS look so I’ll use my AB as a guide…not bad.

Using the AB as a template we’ll trim the brim. I used a white crayon for the tracing and cut it with a scissors. I’ve tried using an exacto blade but I get a better cut with the scissors.


OK, 99¢ worth of grossgrain ribbon aught to do the trick. Sprits the brim with a water bottle to shape it and put the liner back in.

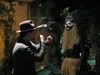
Voila, my new-to-me grey beaver-felt Indy travel fedora! The felt is still a little stiff but not too bad. It'll loosen up nicely as it gets used. The felt feel really nice.
http://i622.photobucket.com/albums/tt30 ... ol_11s.jpg
That's all for today kids. Come back next time when we learn how to make a Temple of Doom sword out of conduit and an old bicycle tire!


