Page 1 of 3
Leather Bullwhip Build Log - Mod approved
Posted: Fri Aug 24, 2012 10:42 pm
by folkprophet
Got permission to create a build log with more than the standard 6 pics. So here it is. Posting first pics shortly.
Re: Leather Bullwhip Build Log - Mod approved
Posted: Fri Aug 24, 2012 11:10 pm
by folkprophet
Okay, so here's the goal: 8 foot Raiders style bullwhip, except for the color, which the financer of the project (I'm making this for someone who paid for the materials) wants "not too light".
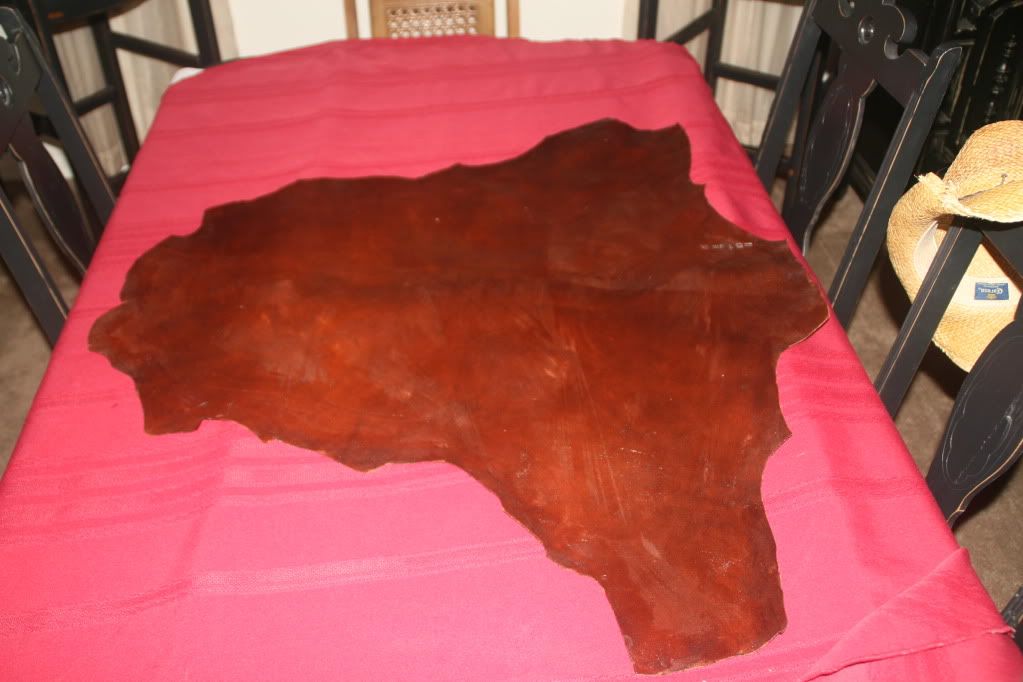
Started with one of the skins I got from Tandy and smeared/soaked it with conditioner (1 hour per side).
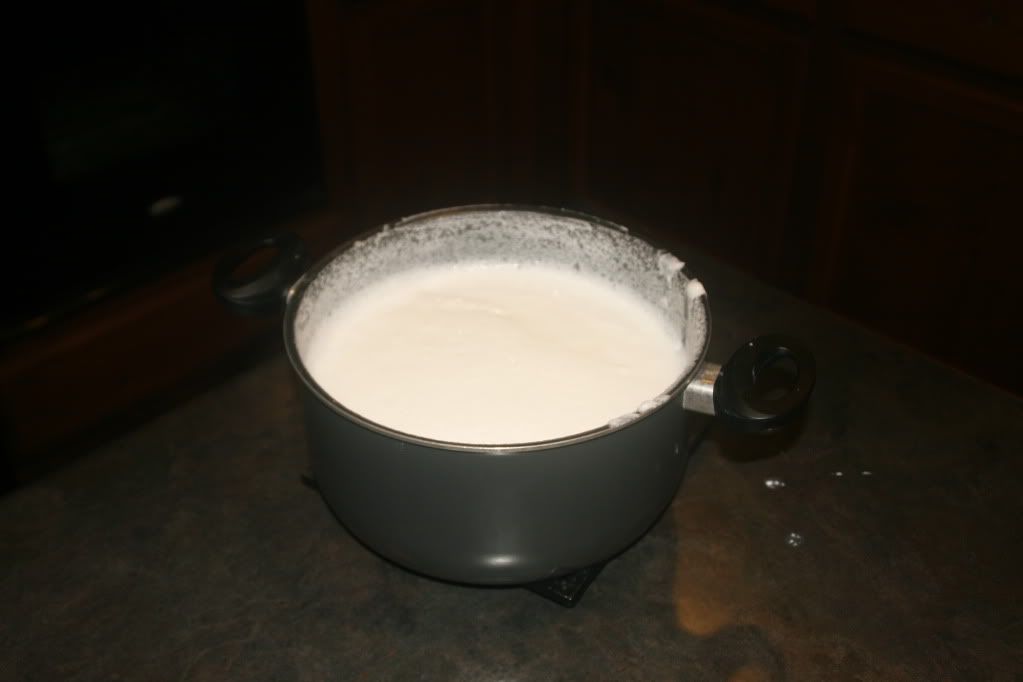
Meanwhile I cooked up my plaiting soap. I used the simple David Morgan recipe, but used Dove soap instead of Ivory because that's what I accidentally bought. So that's my new secret ingredient. I guess.

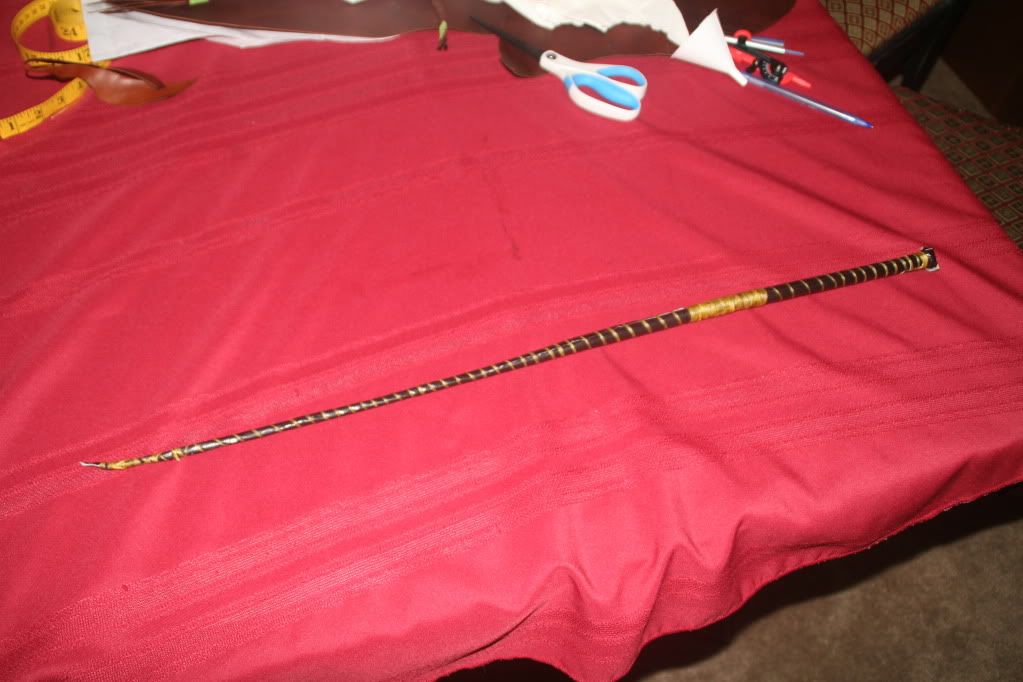
Once that was done I first cut out a strip and duct-taped a shot bag out of it with some lead shot. I like this method because it keeps the transition from the spike to the core very smooth. I wrapped the transition area tightly with waxed sinew as well.
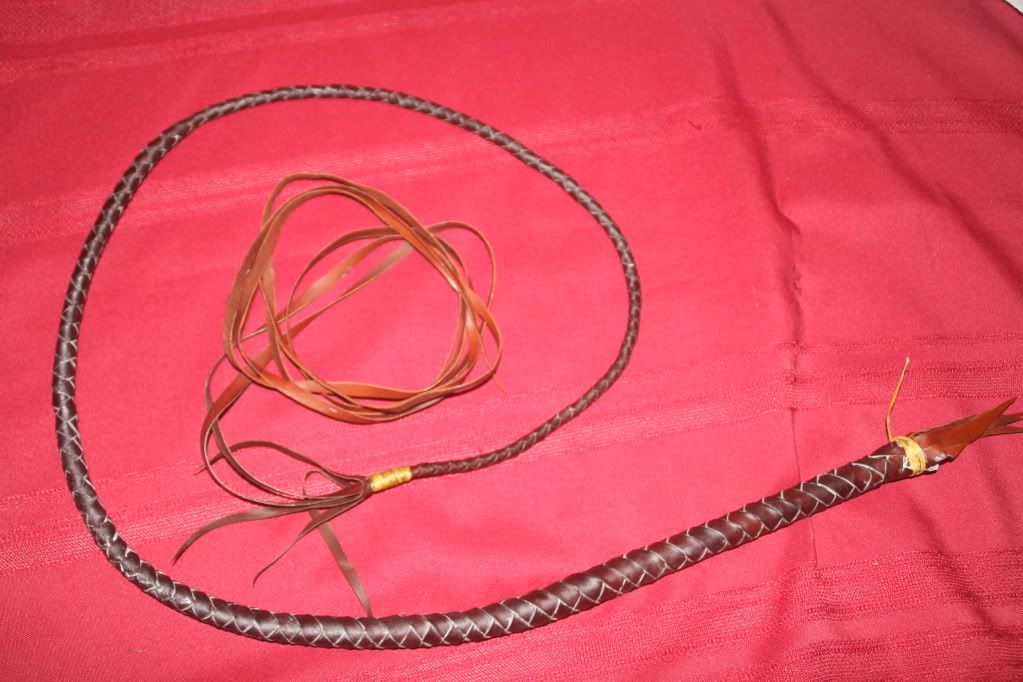
Then I cut strands and braided. Here's my theory -- a braided core would be 4 strands...I went with an unbraided core, but still...so belly one I did 6 strands (dropping to 4). Belly two I'll do 8 strands (dropping to 6 and then 4). And the outer plait I'll do 12, dropping to 10, 8, and 6 (unless I decide to end it with 8 -- not sure yet.) I'm cutting 2 strands of each belly 2 feet longer than the others to be the core of the whip for the next part.
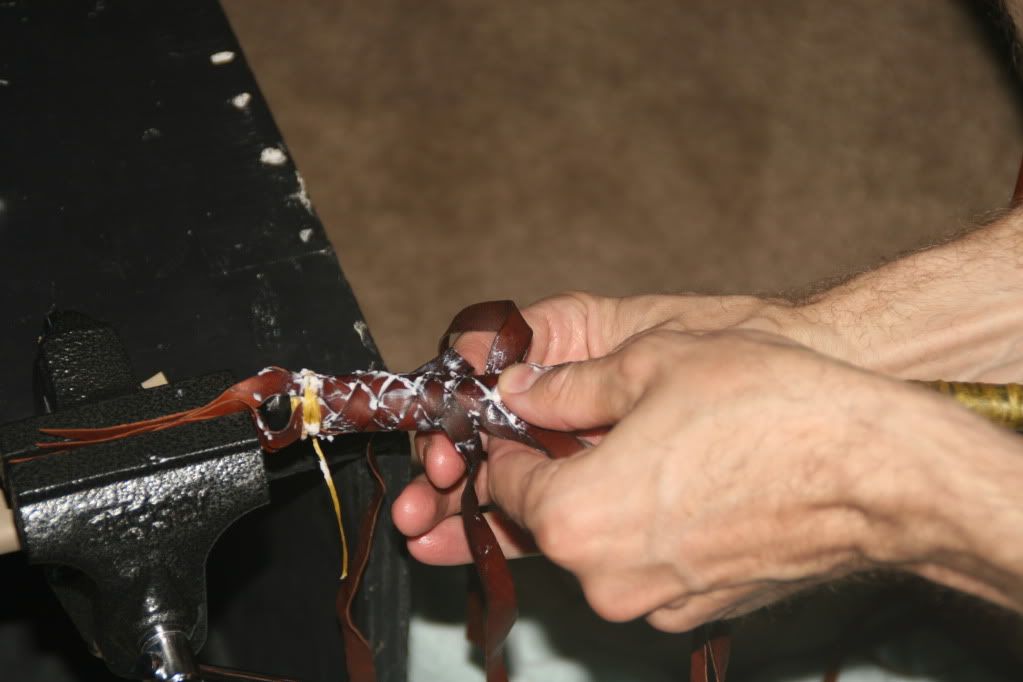
And here's the finished first belly braided over the shot-bag core:
Re: Leather Bullwhip Build Log - Mod approved
Posted: Fri Aug 24, 2012 11:39 pm
by riku1914
It's very easy to make a smooth transition from handle - thong without doing a loaded core... ( also it makes the whip turn out a lot thicker using a shot loaded core as opposed to just a rolled leather core coming off the handle )
My suggestion, do each of the bellies 4 plait. It's quicker, easier, and makes a very tough base for the whip. Plus it makes the first half of the whip free of strand drops, meaning no chance of there being any kinks or bumps as long as it's plaited tight all through.
I wouldn't bind on the bolster if I were you ( I noticed you did binding on the shotbag, that's ok as long as it's not too much and it's not too tight ) because you want a really smooth surface to plait over. Plus you want the plaiting to really dig into the bolster, which it can't do if it's covered in binding.
Oh also, you don't need that much binding to tie off the plaiting. I do just three wraps or something like that.
It's looking good so far, keep it up!
Does dove soap have anything added to it? The reason we use ivory soap is because it's like 99.9% pure soap, and that's what you want in your plaiting soap. As long as it doesn't do anything weird to the leather though, I don't see a problem with using it.
edit: where you dropped from 6 to 4, there's a sudden drop in diameter. Do you know what caused this? My guess is that you cut something out before dropping the strands, trying to minimize any bump there might be. Am I correct? If so, that's not needed unless you are dropping two very wide strands into the core ( which shouldn't ever be done! ).
If not, do you know what caused it? At least you'll know for next time

Re: Leather Bullwhip Build Log - Mod approved
Posted: Sat Aug 25, 2012 12:39 am
by folkprophet
riku1914 wrote:It's very easy to make a smooth transition from handle - thong without doing a loaded core... ( also it makes the whip turn out a lot thicker using a shot loaded core as opposed to just a rolled leather core coming off the handle )
I am starting to worry about it being too thick. But I'm going for it with this first one. However, when using braided cores, I found that the immediate transition from the bulk of the spike to the core made it rough. Also, that braid ends up being hollow. I like the shot bag idea in that it is not hollow too. Hmm.
riku1914 wrote:My suggestion, do each of the bellies 4 plait. It's quicker, easier, and makes a very tough base for the whip. Plus it makes the first half of the whip free of strand drops, meaning no chance of there being any kinks or bumps as long as it's plaited tight all through.
I kind of like that theory as it is just easier. But wouldn't the tighter braiding of the smaller strands make it...uh...better somehow?
riku1914 wrote:I wouldn't bind on the bolster if I were you ( I noticed you did binding on the shotbag, that's ok as long as it's not too much and it's not too tight ) because you want a really smooth surface to plait over. Plus you want the plaiting to really dig into the bolster, which it can't do if it's covered in binding.
Hmm. See my post on the binding in a few posts.
riku1914 wrote:Oh also, you don't need that much binding to tie off the plaiting. I do just three wraps or something like that.
I cut it off and redid it already. Yeah, way too much. I overdid it.
riku1914 wrote:It's looking good so far, keep it up!
Thanks.
riku1914 wrote:Does dove soap have anything added to it? The reason we use ivory soap is because it's like 99.9% pure soap, and that's what you want in your plaiting soap. As long as it doesn't do anything weird to the leather though, I don't see a problem with using it.
Not sure, but I've seen some recipes that use it, so I figured it would work. The leather is getting darker, but I expected it too as I've read that the use of lard does that.
riku1914 wrote:edit: where you dropped from 6 to 4, there's a sudden drop in diameter. Do you know what caused this? My guess is that you cut something out before dropping the strands, trying to minimize any bump there might be. Am I correct? If so, that's not needed unless you are dropping two very wide strands into the core ( which shouldn't ever be done! ).
If not, do you know what caused it? At least you'll know for next time

That's the end of the core. If I do a braided core on the next one, I'll just run the two thin strand from that the full length of the final whip. That's a good idea.
Re: Leather Bullwhip Build Log - Mod approved
Posted: Sat Aug 25, 2012 12:41 am
by folkprophet
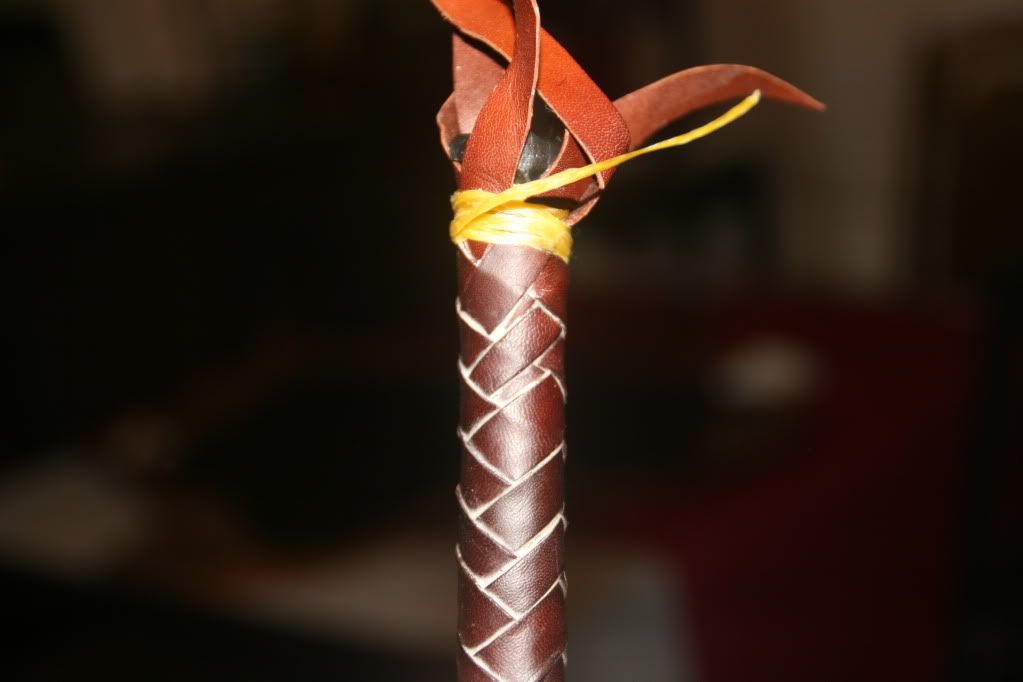
Second strand from the top is the only place on this first braid where the stretch caused issue. I will try to avoid that on the next whip. I'm not super worried about it here because this area will be under the knot anyhow...but....
Re: Leather Bullwhip Build Log - Mod approved
Posted: Sat Aug 25, 2012 12:44 am
by folkprophet
So I did bind on the bolster.
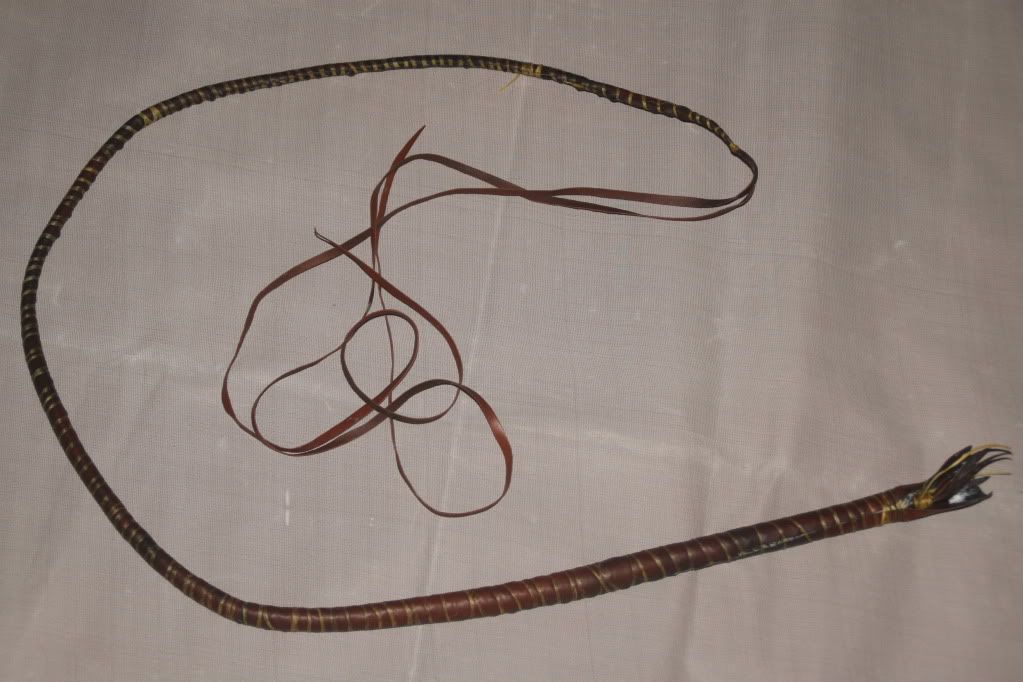
It is sectioned from the kangaroo leather. I know some people use other leather, but I really like the idea of all roo. I cut off the outside edges of the hide where I was having problems with stretch. I didn't sew them together. I just bound it on. I have a hard time seeing the thin waxed sinew (very flat) causing any issues with the smoothness in the plaiting. I'm not pairing the bellies, so I don't expect perfect smoothness anyhow. Maybe a mistake.
Anyhow, if I don't bind the bolster on, do I just fit it on as I braid? Use the plait to hold it in place?
edit: I'm also resistant to remove the binding because I cut my finger with a pair of sharp scissors putting it on (cutting off the too thick tie-off on the belly) and so I suffered for the process. Heheh.

Re: Leather Bullwhip Build Log - Mod approved
Posted: Sat Aug 25, 2012 4:12 am
by Canuck Digger
Good on you (and the mods) for doing this log, it will allow you to get feedback.
Ok on with it.
So just so we are on the same page, the word "core" has a few different definitions depending on the situations. Here are the most common ones you are likely to encounter: The core as a tapered piece of leather over which the first (and in the case of a stockwhip, only) belly is plaited. The word core can also be used to refer to loose strands, as in strands leftover from the plaited bellies, that are carried on as loose strands and which then become the core for the next section of the whip or dropped strands from the overlay, again running as loose strands forming the core in the second half of the (bull)whip. The core can also be meant as what you are plaiting over. A round plait should always be over something, so by definition, whatever is in the middle, can be thought as the core, but the use of this word is usually reserved for the initial leather piece and the loose strands that are plaited over.
As I mentioned just above, never braid a round plait without a core in the center; this addresses one of your concerns...
You do not have to tie off or bind the end of a belly, you can simply tie a half-hitch until you are ready to cover the area, either with a bolster or another braided layer and untie it then and simply plait over it. Or if you wish you can tie it off, just make sure that you are not causing any kinks to appear or to create a section that suddenly becomes very hard and rigid, which would drastically change the quality of the plait. A few turns are enough. If t=you do tie the end of the plaiting off, might I suggest the following idea: pull the belly strands forward so they are not at an angle but pointing toward the tip of the whip, which is basically what you would be doing by undoing a half-hitch anyway.
If you wish to tie on the bolsters, here are a few things to keep in mind: better to use fine, strong sewing thread as this will secure the bolster without imparting any other qualities, like potentially uneven rigidity or bulk (even sinew adds up if there's enough of it...). Also, if you do tie the bolster on, it would be a good idea once you have reached the end of where you are tying it on, to double-back and return to the handle with your thread; this will create a criss-cross effect that will negate any twist a unidirectional binding might impart on the whip.
When splicing two pieces of bolster, like on a long whip, cut the splice as a long tapered angle, not as a straight cut perpendicular to the direction of the whip. This will not only hide the splice better but it will insure that there is no sudden change in the quality of the bolster. If you are tying on the bolster, then you can simply tie the second piece on and keep going with your thread. If you are not tying on the bolster, as many do not, then the idea is to place it under the overlay as you are plaiting over the splice just a bit before the splice and plait for an inch or two leaving the tip of the new bolster piece sticking out from the overlay. When you have plaited over the tip a bit, gently pull it and the tip of the bolster will slip under the overlay and lay in its place. From then simply keep on plaiting over the splice until you are over it, making sure you exert an even pull on your strands as you plait over the splice.
I find that 4 strand bellies are not only faster and easier to plait, but because they have wide strands, offer a measure of support and tone to the thong, which I find to be overall beneficial to the whip. Even broken in, such bellies tend to stay firm.
Unless using very thin leather, it is always a good idea to pair all strands in a whip, even the belly strands. They will lie more neatly once rolled and create a smoother surface to build the next layer over. There is a lot of prep work in whipmaking and no shortcuts; the work you (don't) do in prep will show up later.
The sudden drop in diameter at the end of your core is something you should fix now. it is not that far away that it is a major headache to undo the plaiting to that point. I would suggest you undo the plaiting and fix this by adding a strand of appropriate size and resume the plaiting over it to your predetermined end of belly. It will make your whip a lot smoother and at this point is not a major fix, but trying to fix this later will be all sort of skiving nightmare. The sooner you catch a problem the easier it is to fix, as with many things in life...
You might also consider starting your first bolster from the end of the handle, as opposed to the base of the handle. While this will require some skiving to make the taper match, it would reduce the size of your handle, while evening out the drop at the tip of the handle.
It is your first one so things won't be perfect and that's ok. But better to learn how to fix the problems now that to keep repeating them later on...
Good luck. Keep posting.
Cheers,
Franco
Re: Leather Bullwhip Build Log - Mod approved
Posted: Sat Aug 25, 2012 8:13 am
by riku1914
You can plait just as tight with the wider strands, it's just more difficult when you're first learning.
" I have a hard time seeing the thin waxed sinew (very flat) causing any issues with the smoothness in the plaiting"
Trust me, it can. I used to bind on all my bolsters, but now the only binding I do is enough to hold it on.
" Also, that braid ends up being hollow. I like the shot bag idea in that it is not hollow too. Hmm."
If you just plait up until the end of the core, it's never hallow. It's not a good idea to plait over nothing, and you understand that, but where I think there is some confusion is how things are executed with an all leather core. I'm going to be gone all day, so maybe franco can explain the basics of this ( he's the one that explained it to me when I was first starting! ) so you can better understand for next time.
"Not sure, but I've seen some recipes that use it, so I figured it would work. The leather is getting darker, but I expected it too as I've read that the use of lard does that."
Yes, that's completely normal, if it wasn't getting darker you'd be doing something wrong

What are you referring to as a braided core? The very core of your whip is the shot, but the core of an all leather whip is just a strip of leather with plaiting over it, just like yours, minus the lead shot.
"That's the end of the core. If I do a braided core on the next one, I'll just run the two thin strand from that the full length of the final whip. That's a good idea."
That could work but it's actually not a very good idea. If franco explains what I was talking about you'll understand, otherwise when I get home later I'll explain it a little bit.
Re: Leather Bullwhip Build Log - Mod approved
Posted: Sat Aug 25, 2012 12:14 pm
by folkprophet
Reading. Implementing. Moving forward.
Thanks. And definately let me know on the core theory. That's something I still am not quite getting I guess. I'm guessing that it's a piece of leather that is wrapped around the spike and then just hangs to braid over. But... how does it come off the spike...is it the same width coming off the spike and then tapers down? How long...should I cut it to run the length of the finished whip right from the start? Or should I only drop strands into the first belly to extend the core for the next belly. Both make sense to me. Etc., etc, etc...?
Re: Leather Bullwhip Build Log - Mod approved
Posted: Sat Aug 25, 2012 3:37 pm
by Canuck Digger
It is exactly what you just described; a length that encircles the spike and extends past it as a long tapered strip that can be split into two, so that you have a smaller half lying inside the wider one so as to better form a dense solid core. Roll round. Tie off with sewing thread if you wish but only tight enough to keep its shape.
You plait over this and stop just before you reach the end, never plait over nothing.
The length is a question of taste and this defines a whipmaker's style to a great extent, so I;m not going to tell you how each and everyone one does it, you can ask them if you want, but as a general rule, you can say the core is usually anywhere between 1/4 to 1/3 the length of the entire whip PAST the handle (again, when talking about bullwhips, the length always refers to the plaited length and never includes the fall and cracker). So the handle PLUS the length you choose.
Some make their cores run half the length but stop plaiting the first belly partway, which pretty much does the same thing but from a different approach.
Also when we say belly we only mean the braided part of the belly, as the leftover strands that extend beyond the braided section then become core strands (and back to what I said in my previous post about the definition of cores...).
Hope this helps.
Franco
Re: Leather Bullwhip Build Log - Mod approved
Posted: Sat Aug 25, 2012 5:06 pm
by folkprophet
Canuck Digger wrote:It is exactly what you just described; a length that encircles the spike and extends past it as a long tapered strip that can be split into two, so that you have a smaller half lying inside the wider one so as to better form a dense solid core. Roll round. Tie off with sewing thread if you wish but only tight enough to keep its shape.
You plait over this and stop just before you reach the end, never plait over nothing.
The length is a question of taste and this defines a whipmaker's style to a great extent, so I;m not going to tell you how each and everyone one does it, you can ask them if you want, but as a general rule, you can say the core is usually anywhere between 1/4 to 1/3 the length of the entire whip PAST the handle (again, when talking about bullwhips, the length always refers to the plaited length and never includes the fall and cracker). So the handle PLUS the length you choose.
Some make their cores run half the length but stop plaiting the first belly partway, which pretty much does the same thing but from a different approach.
Also when we say belly we only mean the braided part of the belly, as the leftover strands that extend beyond the braided section then become core strands (and back to what I said in my previous post about the definition of cores...).
Hope this helps.
Franco
Okay. I will try this method on my next whip. Thank you!

Re: Leather Bullwhip Build Log - Mod approved
Posted: Sat Aug 25, 2012 7:26 pm
by riku1914
Splitting the core in two won't hurt anything but I haven't done that since my first whip. It hasn't made the belly turn out like an oval or square in the slightest bit.
To add a little to what Franco said, I make my core go about 1/4 the whip's length past the handle ( on whips 6 ft. long and longer, with an 8" handle. On shorter whips you have to change it up, as well as with different handle lengths ). I have the first plaited belly go the length of the core, then I have the first bolster go about 1/2 the whip's total length, with the leftover strands from the first belly tapering evenly through that length also ( I also change up how I do that layer depending on the style of whip ). Then the second belly covers the first bolster, and the second bolster goes roughly 3/4 the whip's length. The second belly strands taper evenly throughout the rest of the whip, with 1 of the strands ( again depending on the style of whip ) remaining straight through to the fall hitch. I also only drop strands once I reach the end of the second belly ( unless I were using quite thin strands, like on anything 20 plait and over ).
I say roughly, because I change it up to suit the style of whip, length of whip, and to get the best overall taper.
Also, when I'm making a thinner whip, or I have bolster leather that's too thick for the style I'm going for, I grind a rebate on the end of the handle and attach the core there. That does two things. First, your core isn't as wide as if it encircled the entire handle, so you have a thinner base. Two, you have one less layer over the handle.
Re: Leather Bullwhip Build Log - Mod approved
Posted: Sun Aug 26, 2012 1:51 am
by folkprophet
2nd belly.
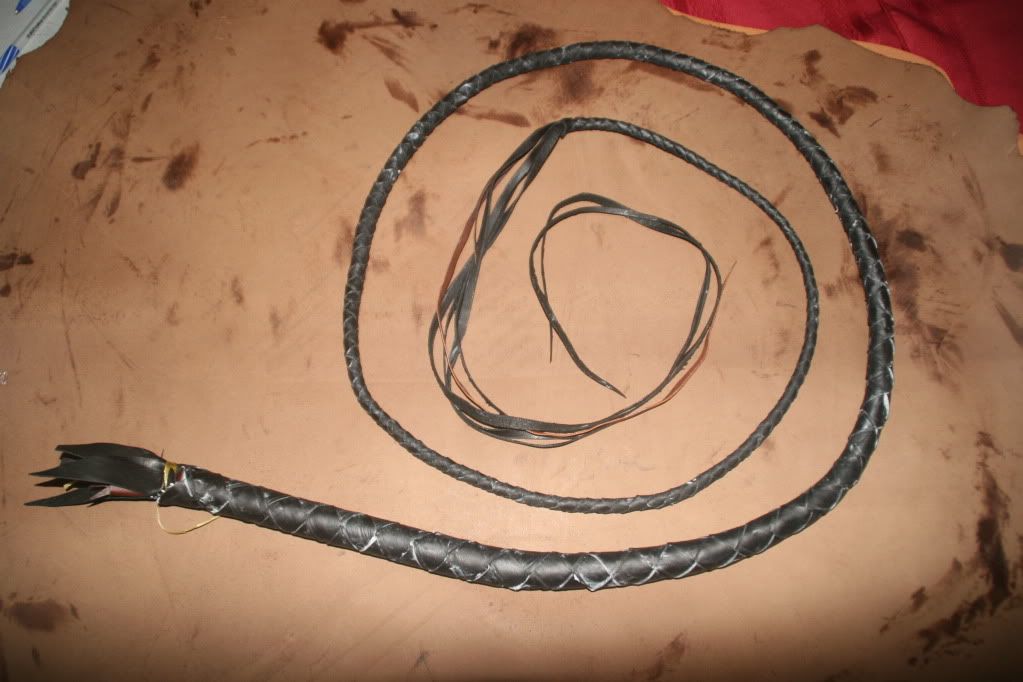
I did it with 4 strands as suggested, measuring the circ. of the whip every 12 inches or so and tapering the strands accordingly. I also made an effort to bevel the edges (pair) these strands but don't feel like I did a very good job. I got a safety beveller from Tandy's that I used. Is there a better/easier way?
Re: Leather Bullwhip Build Log - Mod approved
Posted: Sun Aug 26, 2012 4:40 am
by Canuck Digger
When making a bullwhip, you want to keep an eye on size, especially over the handle, and one way of doing this is to start the first bolster at the end of the handle and not over the entire handle. You wouldn't want to do this for the second bolster but for the first it's ok. What this does is it leaves the handle thin and because there is a bit of a drop or a step-down after the handle, the thickness of the bolster will fill this gap and even things out so there is no more step after that.
The second belly can either be made with a long keeper (like the first belly) that encircles the spike and the plaiting started only at the tip of the spike, or it can be plaited as you've done from the base. But when plaiting from the base, one would usually have made the previous layers thinner by not starting the first belly from the base of the spike... Right now you are going to have a rather large handle the way you've set this up. Keep in mind plaited layers add 4X the thickness of the leather used... it can add up pretty fast... If you wanted to thin it down at this point, the only thing I can see if to undo the second belly plaiting from the base, but not all the way to the end of the handle; if you undo the plaiting until you get to about an inch or so from the tip of the whip and bind it there, you could lay the strands flat against the spike, so it would only add 2X the thickness of the leather instead of four... You could also forgo the second bolster entirely if you see it adds too much size, OR you could have it start a bit past the end of the spike and thin the edge of the base of the bolster so it matches the taper and this way you might be able to save some more on the bulk over the handle, and smooth out the taper of the thong at about 6" past the end of the handle. This is not the usual method and I would not normally recommend this, but as you've already built up the handle part quite a bit, and you have a bit of a sudden drop in taper at that point, this may be an option, though you would have to try it to see for sure; it's very hard to tell unless you can fool around with it and see if it works or not.
As for skiving the belly strands, a common practice is to skive both edges on the flesh side when plaiting a four-strand plait in the round or a flat braid. Skiving opposite corners only takes on it's meaning when plaiting with more than 4 strands. I have never used a safety beveler for skiving strands, though I do use it to fit bolsters and sometimes even to skive the corners off of a fall. For skiving strands, I wrap a leather of leather around my finger on one hand and holding the knife (like a box cutter knife) in the other, I bring both hands together until the two top fingers are butted up against each-other and the blade is resting on the leather thimble and then the strand runs over that finger and I walk backward and skive the strand. David Morgan has a very nice little video of this on youtube...
Remember to roll every layer...
Re: Leather Bullwhip Build Log - Mod approved
Posted: Sun Aug 26, 2012 4:49 am
by Canuck Digger
I just realized something after looking at your last pic again; if you undo the second belly plaiting from the base of the handle until you get to that spot about 6 inches beyond the handle, where the taper dips suddenly, you can try to skive the bolster at that point so it merges with the taper of the first belly and this would also thin down the handle and then all you need to do is to replait the second belly until you get over the tip of the handle, like maybe an inch or so, and bind it there and then run the strands flat against the handle and bind them over it like a keeper. By doing this you could fix your two main problems: the size of the handle and that taper drop at around 6" past the handle. This would let you start your last bolster over the handle as we normally do and have a finished whip with a better shape and thinner handle.
It's late I may not be thinking as clearly as I might, so I'm going to sleep and re-read this in the morning.
Cheers.
Re: Leather Bullwhip Build Log - Mod approved
Posted: Sun Aug 26, 2012 8:12 am
by riku1914
Just use a knife. Watch this video to see david morgan skiving/paring strands, it's the same way myself and most whip makers do it:
http://www.youtube.com/watch?v=SMxgoHC9yBg&feature=plcp" onclick="window.open(this.href);return false;
Re: Leather Bullwhip Build Log - Mod approved
Posted: Sun Aug 26, 2012 9:46 am
by folkprophet
Canuck Digger wrote:I just realized something after looking at your last pic again; if you undo the second belly plaiting from the base of the handle until you get to that spot about 6 inches beyond the handle, where the taper dips suddenly, you can try to skive the bolster at that point so it merges with the taper of the first belly and this would also thin down the handle and then all you need to do is to replait the second belly until you get over the tip of the handle, like maybe an inch or so, and bind it there and then run the strands flat against the handle and bind them over it like a keeper. By doing this you could fix your two main problems: the size of the handle and that taper drop at around 6" past the handle. This would let you start your last bolster over the handle as we normally do and have a finished whip with a better shape and thinner handle.
It's late I may not be thinking as clearly as I might, so I'm going to sleep and re-read this in the morning.
Cheers.
My plan had been to not cover the handle with the last bolster, as I had not realized that the advice previously had only applied to the first bolster. Of course, the handle as it sits is 23mm, and so even without the final bolster would be 27+. Anyhow, so I think I'll go with this. Unbraid it from the handle end, cut the first bolster off the handle area (tapering the edge for a smooth transition) then braid the 2nd belly back until the handle area and then lay the strands flat and bind it on.
The reason, by the way, that I've been braiding over the handle is because I had issues with the transition from the solid wrap of leather around the handle to the angled braid where the strands at that point would bunch up, look ugly, and cause bulk. I suppose with leather and it's stretch and whatnot that this is less of a problem? So moving forward, I should not braid over my handle for the bellys?'
Thanks more!
Bah
Posted: Sun Aug 26, 2012 8:32 pm
by folkprophet
Well, I'm a bit frustrated. I did (tried) my adjustment for the handle thickness. I first had measured the width going down and it was pretty consistently dropping by about 1 mm after that, so I decided to pull back just beyond the handle, then cut the bolster off. I tapered the end of the bolster, and then tried to lay the strands flat agains the handle and it was a big freaking mess!! Just horrible however I tried it. I finally got frustrated and decided to just braid it back up. However, because I'd been working so many angles to try and get it to lay flat, I had cut some of the length off (stupid, stupid, stupid) so when I braided it back up it was too short. So I bound it on with wax sinew and then wrapped the end where it didn't cover to build it up to match a bit. Fortunately it was only about 1-2 inches short and should be mostly covered by the knot anyhow.

So the end result is that now the whip is thicker immediately after the handle. I think this will work okay as that should be just about exactly where the knot goes on that end. But I did not get the handle as thin as I wanted (was hoping to drop to 19 mm and only got to 21. Plus the bolster and outer plait will come to somewhere around 27.) I could leave the last bolster off the handle, but then it will grow even larger right off the handle. *sigh*

This is a lesson in doing it right in the first place -- which, of course, is hard to do when you don't actually know what right is. Live and learn.
Re: Leather Bullwhip Build Log - Mod approved
Posted: Sun Aug 26, 2012 9:19 pm
by riku1914
A bulge at the end of the handle is a characteristic of indy whips, so it'll be fine doing that

Re: Leather Bullwhip Build Log - Mod approved
Posted: Sun Aug 26, 2012 9:39 pm
by folkprophet
riku1914 wrote:A bulge at the end of the handle is a characteristic of indy whips, so it'll be fine doing that

Is it now? Well, that changes everything.

Bend/Flop
Posted: Sun Aug 26, 2012 9:44 pm
by folkprophet
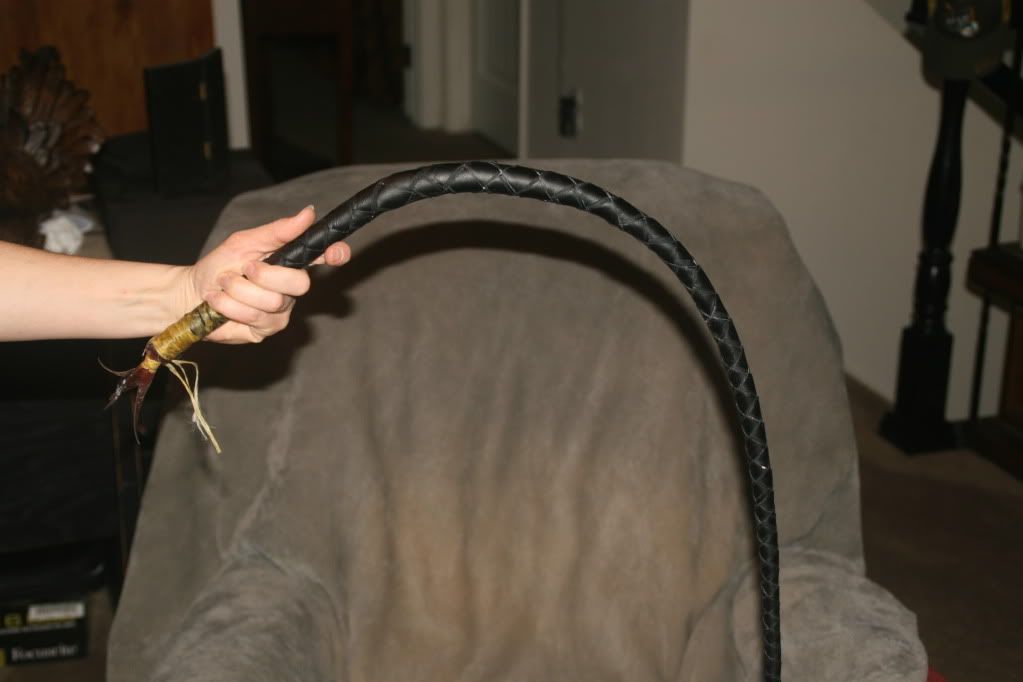
How's the bend/floppiness looking for 2nd belly state? I plaited tight...but the leather I used for the 2nd belly was subpar (amazingoz) and seemed less firm than the other hides I have from tandy. Seems like I read something from riku1914 where binding a bolster close and tight added a fair amount of rigidity to the whip. Should I think about doing that for my final bolster?
Re: Leather Bullwhip Build Log - Mod approved
Posted: Sun Aug 26, 2012 10:01 pm
by riku1914
I don't do it over bolsters anymore, just on bellies. I'll get you a pic of what it should look like shortly...
edit:
you have solid closed loop binding right at the transition, then it goes into multiple layered criss cross that doubles, triples, etc. , each layer going a little shorter than the rest to make it slowly ease off:

Uploaded with
ImageShack.us
Also on the first belly I do 1-2" of closed loop binding right at the transition. Other than that, I don't do any binding. I bind differently and different lengths depending on how tight I'm wanting it. For you, as long as you do a good layer of tight binding, binding the second belly will be sufficient.
Here's another that was bound tighter and longer:

Uploaded with
ImageShack.us
edit 2 : btw, when you get more experienced whip making and are able to plait tighter and tighter the transition will be tighter than yours, so definitely bind as tight as you can get it for now. Later on you can let off and bind less to have the same effect, or you can bind the same or more and get a stiffer transition.
Re: Leather Bullwhip Build Log - Mod approved
Posted: Sun Aug 26, 2012 11:14 pm
by folkprophet
So I'm not understanding why the suggestion is to wrap the belly and not the bolster.
Re: Leather Bullwhip Build Log - Mod approved
Posted: Sun Aug 26, 2012 11:28 pm
by folkprophet
So I had already bound on the bolster (yes, I decided to bind the bolster on this one. Next whip I will do 2 things different. 1: sew the bolster pieces together. 2: not bind it on), so I did your extra binding at the transition and it has definately tightened it up.
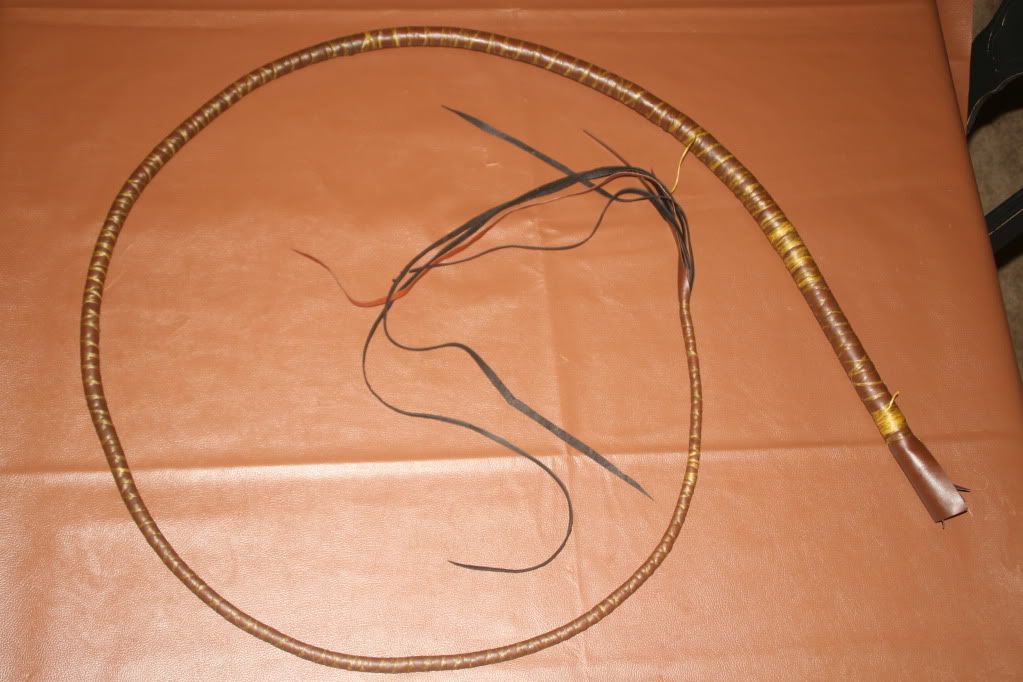
Unless there are major fixes that I actually choose to fix (yes, I haven'te made every fix suggested whereas I have three more whips worth of leather waiting in the wings--so I've been picking and choosing my battles) I'm ready (-ish fingers crossed) for the final plaiting! Well, the final strand cutting (applying that which I have hopefully learned from previous cuttings). This will take some time, and I can't do this full time, so it may take a while, as I'll be being more careful with it, have to do 12, and they're all longer.
Actually, I'm going to cut the core and maybe the first belly (seeing how far I get before I feel I'm into the stronger middle of the hide) for my next whip before doing the strands. So it'll be even slower getting to it.
Re: Leather Bullwhip Build Log - Mod approved
Posted: Sun Aug 26, 2012 11:53 pm
by Canuck Digger
I'll take the questions one at a time.
There are many ways of making whips, but the idea is pretty much the same, even if we don't all take the exact same road to get there. My point is to not take every single detail as being a rigid law, you can play with a lot of the variables in whipmaking but it is important that you understand why many use almost the same techniques. One you "get it" then you can play around a bit more; it's like an architect that wants to deconstruct and build houses in a radically different way... well before you can reinvent the wheel it's a good thing to understand why it's made the way it is. After that you can design caterpillar or other forms of the same idea. But the basics remain the basics.
Right onto the issues at hand.
-The change in direction the leather undergoes as it goes from keeper to strands, is a normal thing. There are a few ways to fix this. Some will cut a tear-drop shape between the two center strands where they split from the keeper. This small amount of leather you take out will allow the strand to bend sideways and reduce the amount of bulge you get. You don't really need to worry about the other two strands, you won't get as much of a bulge there. Just keep in mind that this hole you are cutting at the base of the strands will weaken things a bit, so go easy when you are plaiting your first few stitches. You can increase the pull as you get further away from the keeper. Once rolled, you can bind over this area, which is often done anyway to strengthen the transition zone. In the case of the first belly, this bulge can also further be hidden by grinding a rebate at the tip of the spike for about an inch. It isn't a necessary step and is purely for cosmetic reasons so don't feel like you have to do it. Bernie has all the details on his web site and I believe he may also discuss the rebate briefly in one of his youtube videos. In any even, it's no big deal and if you bind tightly enough with enough rolling, you can get things to become near invisible. As for the second belly, most start it near the tip of the spike, and do the same as with the first belly with the tear-drop cut-out and the rolling and the binding. I on the other hand, do not. I plait the second belly over the entire handle BUT I wrap the lead strip over the first belly keeper at the base of the handle. What this does is the drop-off from the lead to the handle hides the bulge of the strands being pulled sideways. Of course if you are using very thick leather or if you want a particularly thin handle, then I suggest the first (and most used) method.
The bend your whip has is a little more than usual for this stage, but you can do an inch of closed loop bindings and then work with criss-cross bindings to tighten things up a bit, so there's nothing to worry about.
Why bind the belly and not the bolsters? Very good question. Simply put, the bolsters become the surface onto which the plaited layers are braided over and if there is no sinew bindings, the strands can bite a bit more into the leather as opposed to sliding over the slick surface of the bindings. Now this is mostly true for closed-loop bindings, but not quite as much for criss-cross bindings because there is leather poking out from between the bindings, especially if you only do one pass of criss-cross binding and leave it rather spaced out. The idea of bindings is to reinforce the transition zone between the handle and the thong so the leather of the thong is not overly stressed where it comes out of the spike, so the spike doesn't cut into the leather. From that point you can make a very short transition zone, or a rather long one; it all depends on the style, length and desired affect and that, is a matter of choice and style. So better to bind the bellies and leave the bolsters as clean slates for the next plaited layer, but there are ways of playing around with this, once you are more familiar with things.
Hope this helps.
Regards,
Franco
Re: Leather Bullwhip Build Log - Mod approved
Posted: Sun Aug 26, 2012 11:59 pm
by folkprophet
Hey Franco, I read your thread on shellac on the Australian Plaiters & Whipmakers forum. Very informative answers you got there. But I was wondering, does everyone Shellac? Is it just a polish or does it do more for the whip and is integral to the product?
Thanks again
Re: Leather Bullwhip Build Log - Mod approved
Posted: Mon Aug 27, 2012 12:04 am
by folkprophet
Canuck Digger wrote:There are many ways of making whips, but the idea is pretty much the same, even if we don't all take the exact same road to get there. My point is to not take every single detail as being a rigid law, you can play with a lot of the variables in whipmaking but it is important that you understand why many use almost the same techniques. One you "get it" then you can play around a bit more; it's like an architect that wants to deconstruct and build houses in a radically different way... well before you can reinvent the wheel it's a good thing to understand why it's made the way it is. After that you can design caterpillar or other forms of the same idea. But the basics remain the basics.
....
I understand. I always worry when people give awesome (and free) advice and I choose, for one reason or another, to not follow it. I don't want to make them feel like their advice wasn't valued or will never be implemented or what-have-you. I appreciate the advice and thoughts SO much! Sometimes I regret not implementing it. But I learn from that too, eh?

Thank you all for the advice, even that which I did not follow (yet...lots of whips coming still!)
Re: Leather Bullwhip Build Log - Mod approved
Posted: Mon Aug 27, 2012 12:17 am
by Canuck Digger
You are welcome!
And as Obi-Wan once said "You must do what you feel is right, of course."
Cheers,
Franco
Re: Leather Bullwhip Build Log - Mod approved
Posted: Mon Aug 27, 2012 12:31 am
by riku1914
I used to bind over bolsters almost exclusively, then I tried Franco's suggestion about not doing it and the whip turned out smoother, easier to plait over, and better working, so I never went back. Also, when I say easier to plait over, I don't just mean the smoothness of the plait, I also didn't have to put as much effort into the pull to fully tighten the strand.
Shellac makes the whip look nice, and it also gives it some amount of protection. I reshellac my whips when the shellac wears out, especially when the whip is new, because it will protect it from dirt stains. I also do extra shellac on the handle and heel knot because this is the area handled most and it tends to get a stain in the area.
BTW, you won't be able to get your entire overlay out of your hide, especially if you try to cut strands for more bellies out of the same hide. Cut 6 from the first one, cut your bellies out of another, cut the other 6 from that one.
Are you greasing the bolsters inside and out before attaching? I would highly recommend it. In fact with my cowhide bolsters I grease the inside and outside 3 or more times before I even think about attaching them, then the outside is greased again before plaiting over it.
edit: also, if I remember to, I'll take a picture of the second bellies transition stiffness before I bind over it on one of the next few whips I make. Not sure when I'll get around to it but I will eventually.
I have an idea, here's a picture I took not too long ago, look at the bullwhip bellies at the top. It wouldn't bend more than that, in fact I had to force it to coil as much as it did so it would fit in the picture. It would actually hold out mostly straight, including at the transition, if I uncoiled it and held it out, that's how tight you can get these! Don't expect to be able to for quite a while though. Tight plaiting doesn't come from strength, it comes with more experience. It was explained to me like this , as you plait more and more, you subconsciously learn to use leverage, the angle of the pull, and more to get a tighter plait with the same or even less effort. You can't skip the learning curve there is here, it just has to come with time.
Anyway, the picture is done uploading here it is:

Uploaded with
ImageShack.us
Re: Leather Bullwhip Build Log - Mod approved
Posted: Mon Aug 27, 2012 11:19 am
by folkprophet
riku1914 wrote:I used to bind over bolsters almost exclusively, then I tried Franco's suggestion about not doing it and the whip turned out smoother, easier to plait over, and better working, so I never went back. Also, when I say easier to plait over, I don't just mean the smoothness of the plait, I also didn't have to put as much effort into the pull to fully tighten the strand.
This makes sense.
riku1914 wrote:BTW, you won't be able to get your entire overlay out of your hide, especially if you try to cut strands for more bellies out of the same hide. Cut 6 from the first one, cut your bellies out of another, cut the other 6 from that one.
This does not please me.

riku1914 wrote:Are you greasing the bolsters inside and out before attaching? I would highly recommend it. In fact with my cowhide bolsters I grease the inside and outside 3 or more times before I even think about attaching them, then the outside is greased again before plaiting over it.
Depends on what you mean. I did do leather conditioner on this one inside and out. I forgot to use plaiting soap inside, like I had on the previous bolster. (Over excited about putting it on, and not in the habit yet from doing several non-leather whips first). Not sure if I'll take it back off. I do have the belly underneath heavily soaked in plaiting soap.
Thank you!
Re: Leather Bullwhip Build Log - Mod approved
Posted: Mon Aug 27, 2012 11:53 am
by riku1914
It'll be fine. You don't have to grease the hide with leather dressing after you've already greased the dry hide before you cut into it. Just use plaiting soap ( at least that's what I do ).
It takes being VERY careful with the hide to get an 8 footer out of a single hide ( that's not including the core and bolsters, just plaited sections and knots ) and it has to be a hide about 70DM and higher. I still use two hides when making a whip longer than 6 ft. but I have quite a lot left over that I can use for parts of the overlay on other whips, knots, or my whip handle keychains.
Re: Leather Bullwhip Build Log - Mod approved
Posted: Mon Aug 27, 2012 12:09 pm
by folkprophet
riku1914 wrote:It'll be fine. You don't have to grease the hide with leather dressing after you've already greased the dry hide before you cut into it. Just use plaiting soap ( at least that's what I do ).
It takes being VERY careful with the hide to get an 8 footer out of a single hide ( that's not including the core and bolsters, just plaited sections and knots ) and it has to be a hide about 70DM and higher. I still use two hides when making a whip longer than 6 ft. but I have quite a lot left over that I can use for parts of the overlay on other whips, knots, or my whip handle keychains.
I'll give it a shot. Problem is, assuming that I could get those strands from a single hide, I purchased 2 different colored hides as I wasn't sure what color to go for the outside at the time (one darker and one lighter). This hide is a big one though. And based on what I've been able get per size with cutting vinyl out I think I can get the 12 strands I need. I wouldn't mind the knots being of the lighter leather in the end too.
Thanks.
Re: Leather Bullwhip Build Log - Mod approved
Posted: Mon Aug 27, 2012 1:33 pm
by riku1914
Trust me right now, you won't be able to get it. Accommodating for the initial stretch, the stretch after it's plaited, and and any resizing/paring that is done, you won't be able to get your overlay out of the hide. I probably couldn't get the entire 8 footer out of that hide. You'll just end up with a bunch of half length strands that you can't use. Remember that especially as you're learning, get TONS more leather then you think you'll need. For an 8 foot whip, definitely get two hides to use. You'd probably end up using the majority of both the hides, especially with the whip being as thick as it is. Even if you were making a 6 footer I'd suggest you get two hides until you get experienced with hide conservation ( which is another thing you can't skip ahead learning on, it just comes with cutting into a lot of hides ).
Strand Plan
Posted: Mon Aug 27, 2012 2:35 pm
by folkprophet
So the circumference of the handle is 74mm. Divided into 12 is 6.2. Times 1.5 is 9.25.
So I'm planning the following (looking for feedback):
6 12 foot strands starting at 9.25mm and tapering down to 5mm
2 9 foot strands starting at 9.25mm and tapering down to 6mm
2 6 foot strands starting at 9.25mm and tapering down to 7mm
2 3 foot strands starting at 9.25mm and tapering down to 8mm
Question: Is the x 1.5 width to compensate for stretch, or do I compensate for stretch to get to an end result of x 1.5?
Re: Leather Bullwhip Build Log - Mod approved
Posted: Mon Aug 27, 2012 4:20 pm
by riku1914
First of all, I highly suggest you taper your strands so that you don't drop any of them until you are past where the second belly ends.
Second, just cut your strands the 1.5 length and that will be fine.
Second, don't forget to compensate for the stretch, so you'll have to cut the strands 1.2-1.3 times as wide.
Third, just measure the diameter, multiply by 4.5, then divide by 12. The strands are not as wide this way, but in a good way. When you do the circumference, they end up being cut too wide for my liking.
Re: Leather Bullwhip Build Log - Mod approved
Posted: Mon Aug 27, 2012 4:36 pm
by folkprophet
Forgive the impertinent questions, but if I don't ask I can't learn, right?

riku1914 wrote:First of all, I highly suggest you taper your strands so that you don't drop any of them until you are past where the second belly ends.
Why?
riku1914 wrote:Second, just cut your strands the 1.5 length and that will be fine.
All 12 feet long? If you know you'll drop strands, seems like a waste to cut them all that long.
riku1914 wrote:Second, don't forget to compensate for the stretch, so you'll have to cut the strands 1.2-1.3 times as wide.
I'm not clear here. 1.2-1.3 x as wide as the circumference or 1.2-1.3 x as wide as the 1.5 times as wide as the circumference?
riku1914 wrote:Third, just measure the diameter, multiply by 4.5, then divide by 12. The strands are not as wide this way, but in a good way. When you do the circumference, they end up being cut too wide for my liking.
This is to replace the 1.5 x the circumference? 23mm (my diameter) x 4.5 = 8.6. So that is not as wide as the 9.25. Is that what you mean? And then do I times the 8.6 by 1.2-1.3 for the final cut?
And while I'm asking questions: After I stretch, do I then cut the width of everything down to the proper width with a knife and then pair the strands? Or do I just pair it and use that process to get the size right?
Sorry. I have some confusion.

Re: Leather Bullwhip Build Log - Mod approved
Posted: Mon Aug 27, 2012 4:47 pm
by Canuck Digger
The 1.5 times is NOT to compensate for the stretch, that's on top of it. 1.5 X the total width is the finished, ready-to-plait width. The reason is IF your strands are the proper width, they will go around the hide at 45 degrees +/-, and this will also come out at 1.5X the length (it's a simple mathematical relationship but it really only works out if the thickness is negligible, it tends to be a little different with very thick leather.
So you cut your strands wide enough to account for the stretch and the skiving.
Riku has one way of calculating strands, I have another. Pick the one you like.
Also, keep 2 or 3 strands from the overlay long enough to run as core strands for the point of the whip. So the 2 strands that will be dropped from 8 to 6 strands need to be long enough to run as core strands on top of the length needed to plait and drop them into the core.
Make sure the six strands that run to the end are wide enough to cover your core strands. Better to have them wider and trim them if need be than to not have them be wide enough. Keep in mind the point of the whip is what suffers the most abuse and kangaroo leather, although it is much stronger than cow in tensile strength, is weaker to cuts and abrasions than cow leather, so it pays to have a good size strand at the point, unless you are making a very fine whip that will not see too much hard action.
Regards,
Franco
Re: Leather Bullwhip Build Log - Mod approved
Posted: Mon Aug 27, 2012 5:56 pm
by folkprophet
Well, I ruined my first strand trying to pair it with a box cutter. I had feared I would do this. But it's to be expected I suppose as there is a learning curve to the skill. I also had bad lighting and wasn't very patient with it. Yes, I suffer from impatience.

I paired the front side pretty well, I think. Then doing the opposite back side I did this. Grrr.
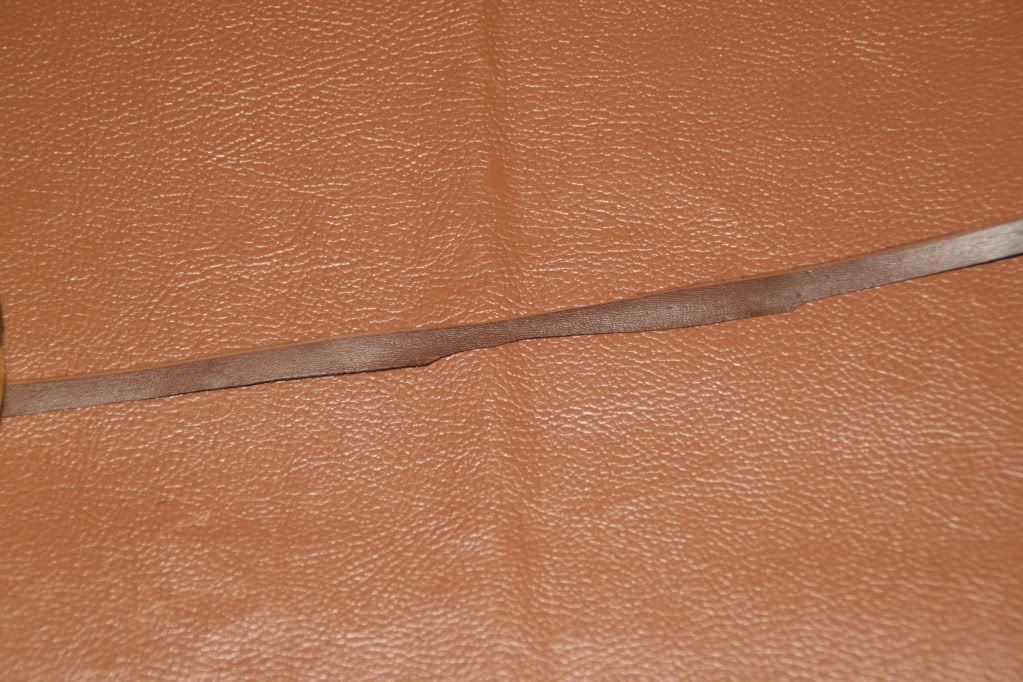
Re: Leather Bullwhip Build Log - Mod approved
Posted: Mon Aug 27, 2012 6:12 pm
by whiskyman
Not sure if these are useful .-but here are some "in progress" pics I took a while back while working on a couple of whips.
10ft and 8ft overlays hanging - with braided 2nd bellies

Skiving overlay strands

Wristloops and falls

Diamond to Herrinbone transition (note unbound bolster)

Braiding overlay (again unbound bolster)

Good luck with your venture! Every whip is a learning experience. The best advice I ever got was from Joe Strain, when he advised me to cut everything by hand rather than use any lace cutter or such gizmo. You really get a better feel for the hide. He also told me it would take 30-40 whips before I was making good ones. He wasn't wrong! Even if I thought my 3rd whip was Ok! If you're serious about making quality whips, you must accept that it takes a lot of work!!
Re: Leather Bullwhip Build Log - Mod approved
Posted: Mon Aug 27, 2012 6:32 pm
by riku1914
folkprophet wrote:Well, I ruined my first strand trying to pair it with a box cutter. I had feared I would do this. But it's to be expected I suppose as there is a learning curve to the skill. I also had bad lighting and wasn't very patient with it. Yes, I suffer from impatience.

I paired the front side pretty well, I think. Then doing the opposite back side I did this. Grrr.

Don't worry, it takes a long time to be able to pare strands correctly.
folkprophet wrote:Forgive the impertinent questions, but if I don't ask I can't learn, right?

riku1914 wrote:First of all, I highly suggest you taper your strands so that you don't drop any of them until you are past where the second belly ends.
Why?
riku1914 wrote:Second, just cut your strands the 1.5 length and that will be fine.
All 12 feet long? If you know you'll drop strands, seems like a waste to cut them all that long.
riku1914 wrote:Second, don't forget to compensate for the stretch, so you'll have to cut the strands 1.2-1.3 times as wide.
I'm not clear here. 1.2-1.3 x as wide as the circumference or 1.2-1.3 x as wide as the 1.5 times as wide as the circumference?
riku1914 wrote:Third, just measure the diameter, multiply by 4.5, then divide by 12. The strands are not as wide this way, but in a good way. When you do the circumference, they end up being cut too wide for my liking.
This is to replace the 1.5 x the circumference? 23mm (my diameter) x 4.5 = 8.6. So that is not as wide as the 9.25. Is that what you mean? And then do I times the 8.6 by 1.2-1.3 for the final cut?
And while I'm asking questions: After I stretch, do I then cut the width of everything down to the proper width with a knife and then pair the strands? Or do I just pair it and use that process to get the size right?
Sorry. I have some confusion.

I'll number the questions on that one.
#1 :
Because if you drop strands over the loose leather that is past the second belly, as opposed to dropping over a hard plaited section, you're more likely to have bumpless strand drops because the loose strand more readily becomes a part of the core.
#2 :
I meant your longest strands. If you're doing a 6 plait point ( a characteristic of all the indy whips except the Crystal Skull one ) then I would suggest cutting 8 strands full length, and the rest cutting a little shorter so as not to waste too much leather. I suggest cutting 8 the full length because if you have a break, you can just back up, drop the broken strand and bring out a previous drop ( that is ,if the strand breaks past where you're dropping. It is worthy of mentioning that you won't have a strand break in the wider strand areas unless you have cut through a bad scar, hole or bite of some sort. )
#3 :
Neither of those, but because that is along the same lines as the next one, I'll skip it for now.
#4 :
Yes, that's what I meant ( first question there ). Multiply 8.6 by 1.2 or 1.3, THEN you have what width you start your strands at. That is enough ( in the good part of the leather ) to accommodate for stretch and paring.
#5 :
Paring and resizing are the same thing in this case. When you are paring a strand, you're basically cutting a straight line down the strand ( which can be adjusted when the strand stops tapering around it's half way point ) . As long as there aren't any bad stretch areas in the strand, you won't have any problems. Also, after you stretch and pare you strands, when using the 1.2-1.3x method, your strands will still be a little wider then the math dictates. That's ok, because they'll stretch a little more when you plait them. So as long as they aren't super wide ( which won't happen as long as you stick to the 1.2-1.3 method ) then they stretch down to about where you want them.
Re: Leather Bullwhip Build Log - Mod approved
Posted: Mon Aug 27, 2012 9:13 pm
by folkprophet
Well, I think I successfully paired a strand without cutting it all skiddly-wampus. However, there are some parts of the cut on the topside that look a bit rough. Leads me to think I might want to do both bevels on the underside. Plus with the darker leather there is a color difference between the dark top and the cut leather underneath. Hmmm.
Re: Leather Bullwhip Build Log - Mod approved
Posted: Mon Aug 27, 2012 10:14 pm
by riku1914
You have to change out the blade a lot when paring strands, it has to be very fresh to keep the cut clean.
Re: Leather Bullwhip Build Log - Mod approved
Posted: Mon Aug 27, 2012 10:56 pm
by folkprophet
riku1914 wrote:You have to change out the blade a lot when paring strands, it has to be very fresh to keep the cut clean.
That could be it, yeah. Though most of it looked good. It was where the strand bent rather strongly on the thicker end... Here's a pic of what happened.
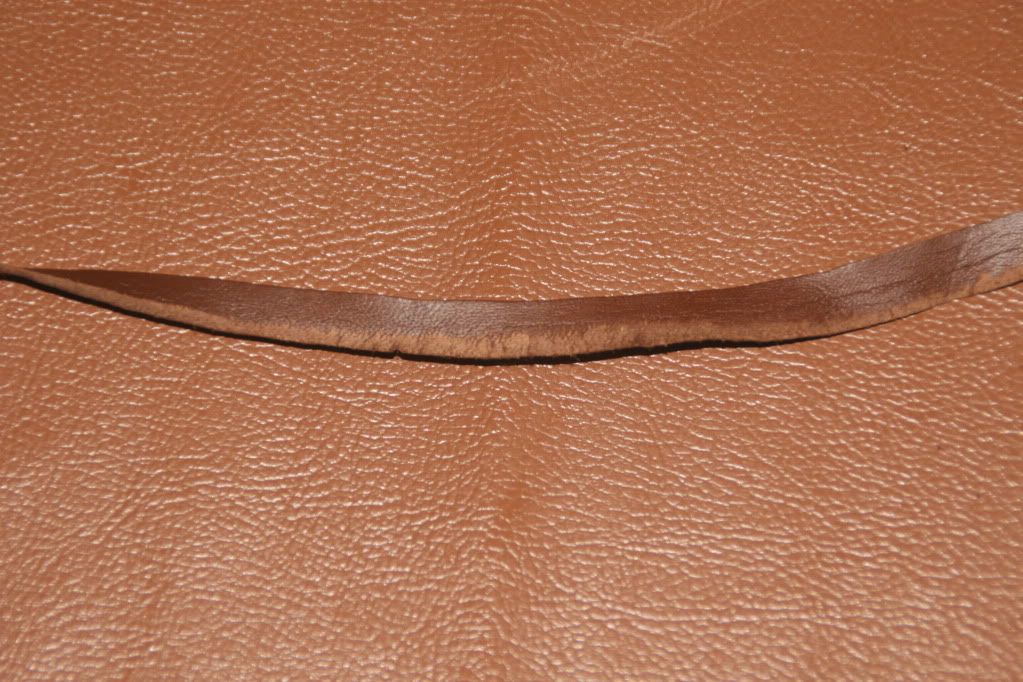
for now, until I get better at this, I think the solution is as I suggested to bevel both sides on the back.
Another strand down the garbage shoot. How right you were about the overusage of leather when you're new.

Re: Leather Bullwhip Build Log - Mod approved
Posted: Mon Aug 27, 2012 11:31 pm
by riku1914
There's only one way to learn, and that's to make mistakes. Even if you don't realize you're making them yet, you'll see them a whip or two from now and know how to fix it. I look forward to seeing the outcome

Re: Leather Bullwhip Build Log - Mod approved
Posted: Tue Aug 28, 2012 12:16 am
by folkprophet
Well, I think I got my first usable strand cut, stretched, paired, and ready to go. 11 more to go.
Re: Leather Bullwhip Build Log - Mod approved
Posted: Tue Aug 28, 2012 1:13 am
by folkprophet
3 strands now. Can't do any more today. Spent more time on it than I should have already.


Re: Leather Bullwhip Build Log - Mod approved
Posted: Tue Aug 28, 2012 1:49 am
by folkprophet
I really like the idea of braiding over the handle for each belly, and I like the idea of the bolster going over the handle as well. So I went to the hardware store and bought me one of these today:
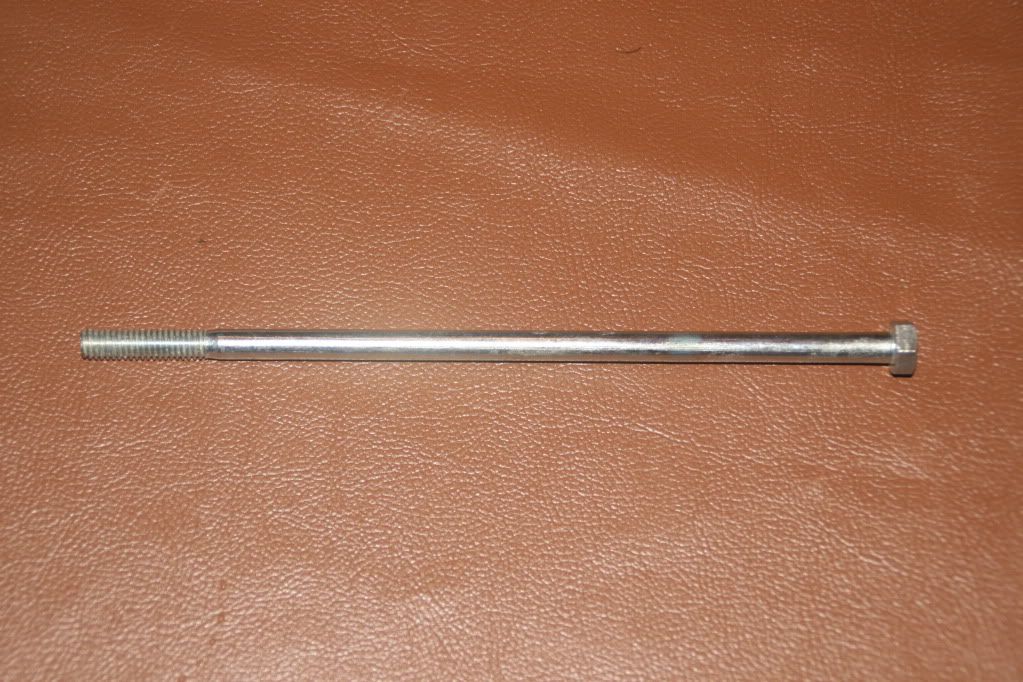
Quite a bit thinner than the spike. I'll grind down the threads enough to attach the bolster, and then with all the layers, should, hopefully, end up with a good end result.
I also ordered a few falls (white hide) and some black twine to make poppers out of from Northern Whip Co. today. I didn't want to deal with cutting falls quite as of yet. Well, I didn't want to deal with trying to get white or red hide to cut falls out of, is more accurate.
By the way, when Tandy runs out of their roo leather (they told me they are going to stop carrying it), or even when I'm ready to move on to something else (Tandy doesn't carry Natural Tan, for example), what is a good source for roo, cost wise (keeping quality up as well, of course)? What about redhide and whitehide for cutting falls. Where to acquire?
Re: Leather Bullwhip Build Log - Mod approved
Posted: Tue Aug 28, 2012 3:25 am
by Canuck Digger
That looks like a 1/4" rod to my eye...
If you grind the thread down, and you should because they are sharp, you can attach a wear-leather in the ground-out rebate. Just remember to round-off the tip. You have about an inch of thread which is the perfect length for anchoring down a wear leather with sinew and you should still have a bit of a step-down which can become very useful for hiding the start of the first belly... I always make the core cover the entire handle so it is solid, and because I grind a rebate at the tip of the handle, even with a wear-leather, the core still dips a bit at the rebate so that when the first belly strands come out of the keeper at that point, the increase in diameter of the plaiting is hidden by this step. The next and last, "step" is at the end of the handle and by starting the first bolster here, you are effectively eliminating it. From then on, the handle should progress out as a naturally tapering thong with no discernible "step" at the end of the handle and by the time you get to the overlay, you should have a smooth surface to plait over.
Plaiting over the entire handle must serve a function otherwise it is just time spent plaiting over a hard surface that will not show up. I only do it with the second belly and that's only because I've devised a system to keep things lean and straight. Most people make the two bellies with long keepers and as you can see, they do really nice work.
Sharpness of blades is very important. A dull blade can injure you more easily than a sharp one; ever try to slice a tomato with a dull knife?
Having said that, I strongly urge you to have the utmost respect for the tools you are wielding; they are not toys and can seriously hurt you if you are not careful. If you make a point of closing the blade at the second you stop cutting, and do this all the time, you will greatly reduce your risks of injury. Imagine this scenario: you've been concentrating on skiving strands and you're sweating a bit and you've just skived one strand and you are walking back to your hook to start skiving another strand when you decided to wipe the sweat off your brown... with an open blade!!! I've almost done this myself once, except mine was closed, thank god! ALWAYS close your blade the instant you are not cutting. I don't care what you do next or for how long, but if that blade is not cutting something it is not out, simple as that! Do this and you will reduce the risks of injury by a lot. PAY ATTENTION to what you are doing, it's important - this is not a game you are using razor-sharp blades and if you are not aware of what you are doing, if you are not fully focused, you are taking risks. I'm being intentionally dramatic because I want you to understand that until you cut yourself (notice I didn't say IF...) you just do not realize just HOW sharp those things are! If you've got things on your mind and you think that you cannot focus adequately, then don't do it. Leave it. Nothing bad will come of you not working on a whip for a couple of hours or even a day; go for a walk, talk it out with those concerned, watch a funny movie, whatever, but always be aware that you are handling a live blade.
Hope this helps,
Franco
Re: Leather Bullwhip Build Log - Mod approved
Posted: Tue Aug 28, 2012 6:42 am
by riku1914
I buy most of my roo here:
http://murphywhips.com/MW17A035BarkTannedKangaroo.html" onclick="window.open(this.href);return false;
And I buy my fall leather here, for the time being :
http://www.midwestwhips.com/Leather.html" onclick="window.open(this.href);return false;
Hey be careful with what you got intending it for a handle foundation. 1/4" is really thin for a regular handle foundation. It will likely bend with time. I you want something that thin you're looking into spring steel. Spring steel is costly and you have to buy a lot of it at once. Because of this I've been selling spring steel already cut to lengths to people who are just wanting to try it out, or I can send a length of 36". Let me know if you're interested in some of these. I have to buy 30ft. at a time...
Re: Leather Bullwhip Build Log - Mod approved
Posted: Tue Aug 28, 2012 1:04 pm
by folkprophet
Canuck Digger wrote:That looks like a 1/4" rod to my eye...
5/16 actually.
riku1914 wrote:Hey be careful with what you got intending it for a handle foundation. 1/4" is really thin for a regular handle foundation. It will likely bend with time. I you want something that thin you're looking into spring steel. Spring steel is costly and you have to buy a lot of it at once. Because of this I've been selling spring steel already cut to lengths to people who are just wanting to try it out, or I can send a length of 36". Let me know if you're interested in some of these. I have to buy 30ft. at a time...
Interesting. I'll PM you for cost. But...as pointed out above...it's 5/16. Still getting thin, but not quite as thin as thought.


