Page 1 of 1
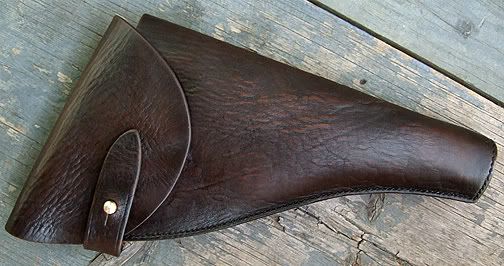
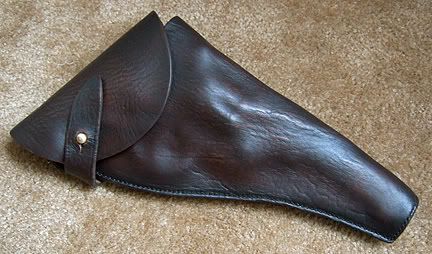
My Take on Todd's Webley Holster
Posted: Wed Nov 26, 2008 8:58 pm
by Shagbd
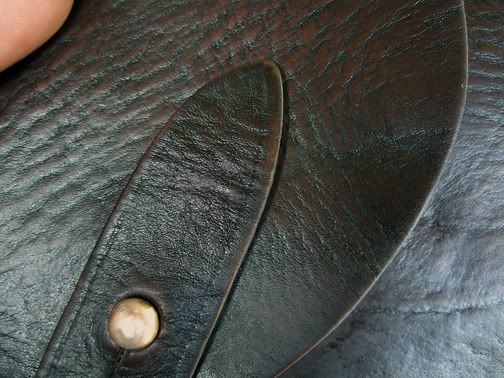
I followed Raider S.s steps and tried my hand at weathering my Todds holster.
looks alot better
i got a bit more aggressive with the sandpaper, but used a finer grit.
also i brought back a bit of the brown with some brown shoe polish and lots of pecards...
whatcha think?
http://i210.photobucket.com/albums/bb13 ... olster.jpg
Posted: Wed Nov 26, 2008 8:59 pm
by Bazza
Looks great.....well done!
Posted: Wed Nov 26, 2008 11:27 pm
by Raider S
Awesome. I bet it will be a favorite of yours now rather than a big black lump of leather. Amazed at how similar ours now look.
Posted: Wed Nov 26, 2008 11:43 pm
by Shagbd
you werent joking about BLACK dye coming off!
Gesh!!!
My hands were stained!!!
nasty stuff.... but alternating between dry sanding for more extreme weathering and wet sanding for subtle weathering is the key.
it was actually a bit lighter than you see above, but i used a lil brown shoe polish to bring it back a tad.
looks more weathered now instead of just beat up.
Posted: Thu Nov 27, 2008 7:33 pm
by knibs7
That looks really cool. Thanks for sharing
Nibs
Posted: Sun Nov 30, 2008 10:03 pm
by Shagbd
thanks guys!
its a neat holster for sure!
Now, I just need to find something to put in it!
anyone have one of Rooks Webleys theyd want to sell?
Posted: Mon Dec 01, 2008 5:33 pm
by 191145
It looks great. I have a Todd's Raiders on the way, so I guess I'll be doing some sanding. It's always good to have the gun in the holster when sanding so you can highlight the high points. You also want to wet-form the holster to the gun like it would get after years of use. I imagine you'll be doing this when you get a Webley or replica. I suggest an emulsion of water/Ballistol (8:1) for wet-forming and wet sanding. Ballistol is a good leather treatment and will not rust where the emulsion may get on the gun while forming. Always remove gun and wipe clean as soon as possible.
Posted: Tue Jan 27, 2009 10:09 pm
by ReturningSon
Posted: Wed Jan 28, 2009 1:23 am
by Solent MKIII
Very good job - looks well worn and not just dry-scuffed with sandpaper.


Posted: Wed Jan 28, 2009 1:44 am
by IndianaJack91
that looks authentic
Posted: Wed Jan 28, 2009 11:29 am
by Imahomer
I think it looks great!
Posted: Wed Jan 28, 2009 4:03 pm
by ReturningSon
Raider S!!! Please repost your steps!!!!


Posted: Wed Jan 28, 2009 6:19 pm
by Imahomer
Yea, please post how you did it.
Posted: Thu Jan 29, 2009 12:58 am
by Indiana Jeff
Raider S's technique discussed here.
http://indygear.com/cow/viewtopic.php?t ... highlight=
As Michaelson would say, "The Search Button is your friend."

Regards,
Indiana Jeff
Posted: Thu Jan 29, 2009 1:17 am
by McFly
Awesome!! I was thinking of picking one of these up for the FL summit (putting together some ToD gear) and I'm glad I found this thread, or I might have been disappointed when it showed up. Glad to hear it's got great potential though, and also to see how to do it.
Good stuff, guys!!!
Shane
Posted: Thu Jan 29, 2009 11:09 pm
by Raider S
Hey guys, here's the text of the post I made. Remember to take care not to sand the stitching and go slow - always easier to sand more than realize you've sanded too much.
First thing I did was let it soak in hot water to see if I could give the leather character and take some of the dye out. It really soaked through and took a couple days to completely dry but developed nice texture and looked better. It was still mostly a black lump, however, so last night I decided to see what sandpaper would do. As soon as I started gently rubbing a wonderful rich, brown color began to show through! After a while I gave it an alcohol rub and let it sit overnight. This morning I thought there were a couple places needing more wear so I continued with the sandpaper and alcohol. Finally, I gave it a coat of Pecards and the results are below. (The photos are less subtle than it looks to the eye.)
The sandpaper was 220 grit, but it was sandpaper that had already been used and nearly ready for the trash. I often keep "broken-in" sandpaper around because it has less of a tendency to simply scratch. This worked well due to it being nice and soft and tended to remove dye more than dig at the leather. After a bit of rubbing that paper would be black with tons of dye. I went over the entire holster and simply worked on some spots longer where I thought it should age more.


Posted: Sun Feb 01, 2009 12:35 pm
by Raider S
Same holster after soaking it again and letting it dry around Rook's Webley:

Posted: Mon Feb 02, 2009 2:44 am
by knibs7
wow i love the texture of the leather after it has soaked

- Reminds me of the Raiders jacket texture
Nibs


