Ok, so I'm getting my Moonstone Fed IV at Christmas, and am going to bash it like the seaplane/washington hat. However, looking at screengrabs, etc. I'm having a hard time figuring out how exactly to bash it. I guess my questions are:
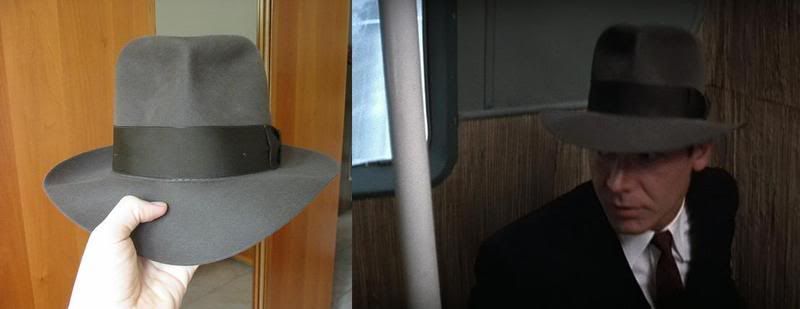
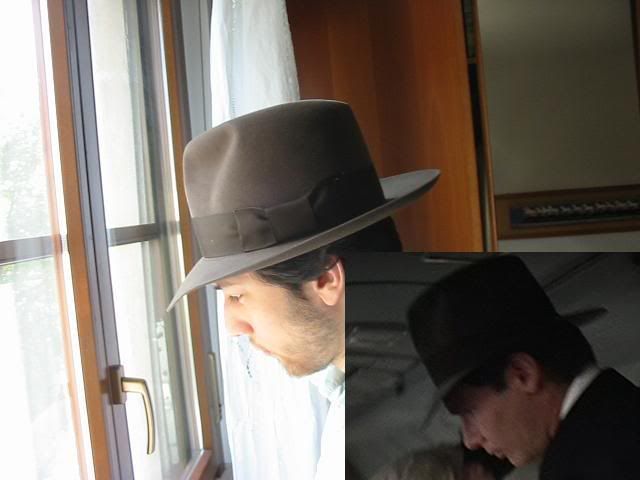
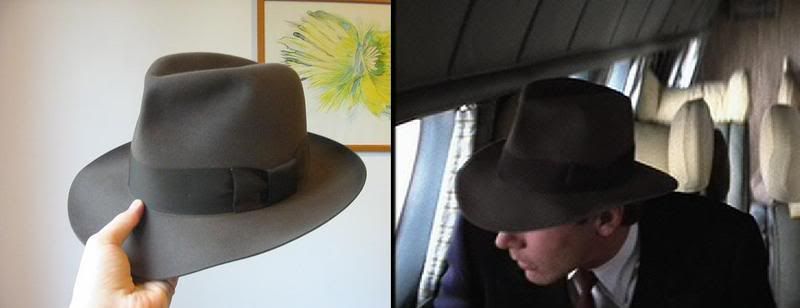
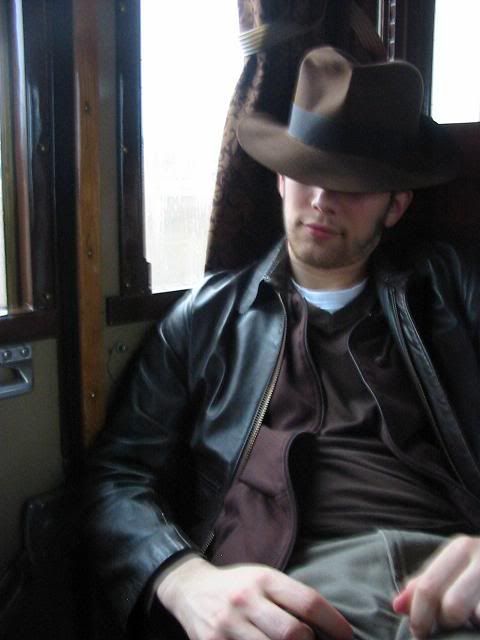
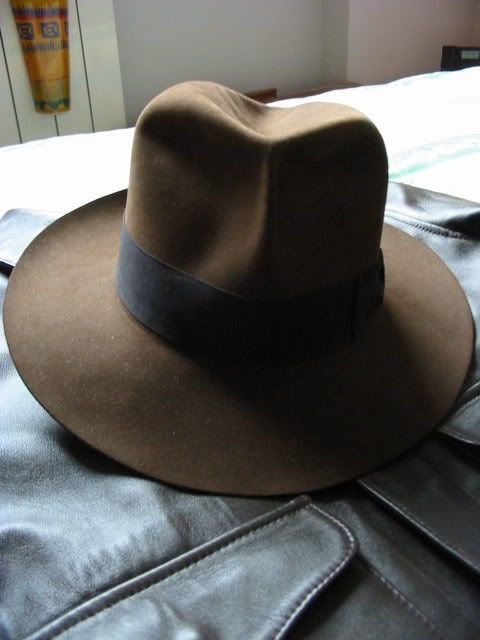
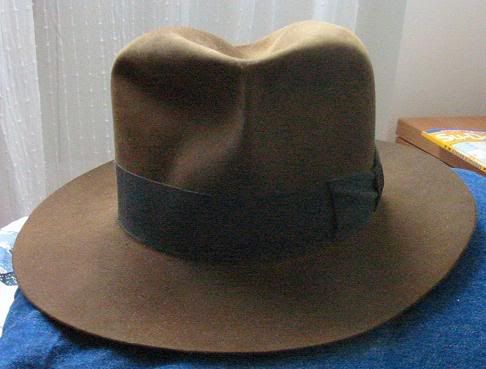
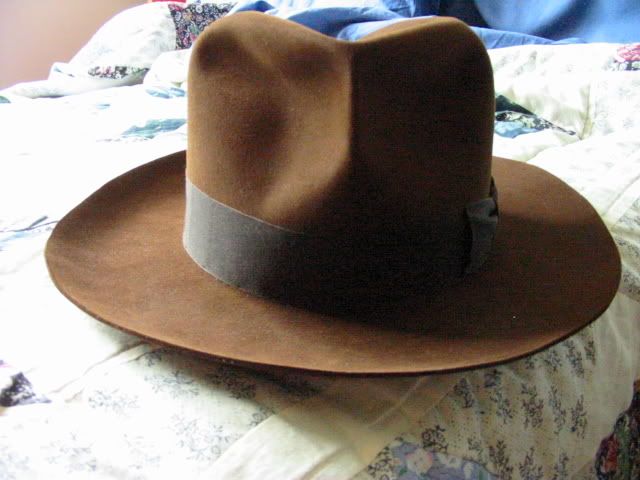
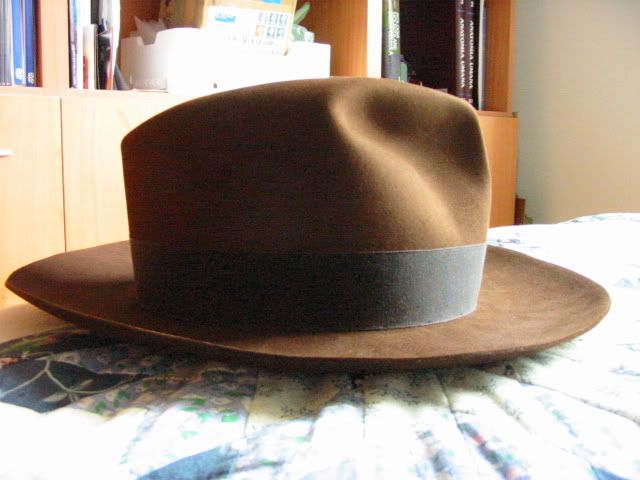
-How deep should I make the center dent?
-How tight should I make the center crease? It doesn't look as tight as Indy's brown hat in Raiders, but still much tighter than any of the other hats from the movies.
-How deep should I make the side bashes? I know they are the same shape as the Raiders hat (only they're symetrical), but how deep should I make them in relation to the brown hat? The same....less?
-And what would be the best way to flatten the back of the brim, as is seen on the seaplane/washington hat? I know there is some slight curl on the sides, but how should I make the back of the brim flat?
Hopefully someone can answer some of these, even if not all of them.
Thanks,
Bogart
bashing a seaplane/washington hat....
Moderators: Indiana Jeff, Dalexs
- IndianaBogart
- Dig Leader
- Posts: 651
- Joined: Wed May 21, 2008 10:25 am
- Location: ...listening to a tinny piano playing in the parlor downstairs....
I just did a bash of a "grey" hat which I think it's very very close. You might have a look at this thread viewtopic.php?p=513264 where i posted pictures from the film in comparison.
About your questions... I might take measures of mine but I really only used my eye having screengrabs in front of me to cover all possible angles (yes I have plenty of screengrabs lol). About the easyness of the bash that depends only on the felt. I did mine on a Christy which, I dare say, reacts almost like a beaver felt, I don't know how the Akubra reacts to the bashing.
- IndianaBogart
- Dig Leader
- Posts: 651
- Joined: Wed May 21, 2008 10:25 am
- Location: ...listening to a tinny piano playing in the parlor downstairs....
Thanks Erri! I actually just saw your post before I started this thread. I had been meaning to and then seeing your post reminded that I had a few questions about bashing the hat. This will be my second bash (I have a Fed III). I did get to try on my Fed IV before it went in the closet, and the felt was much softer than my Fed III, so I'm too worried about that. I was just trying to get some specifics. Really my biggest thing that I may need help with is getting the brim right.
Your hat looks great, by the way! I can't get over that color! Congrats on an awesome hat.
Thanks a lot bogart.
Unfortunately I bought a new camera that can make videos too late otherwise I would have showed you the basics of the seaplane hat from an unbashed hat. If yours still has to come you have time to learn some details, for now I'll just tell you that:
1) the center pinch is obviously higher than a raiders and gives to the hat a distintive (but generic) square look.
2) The back is also quite tall compared for example to a cairo hat, so much that is only slightly under the line of the front. The side dents also don't go too deep in.
to have this effect it's important also to pinch just under the ribbon so that the felt "learns" the curve that it needs to do... perhaps I'll explain that more in detail eventually. It's an old trick I learnt from a former member which has been kept in secret for long time.
3) Lastly, for the front pinch don't make the common mistake to pinch hard all the way to the ribbon... the raiders hat had only that extreme treatment for the idol grab scene... in this one you will notice that the pinch is decisive but not all the way down to the ribbon
I hope this somehow helped. Feel free to contact me when you get your hat and I'll be glad to give a hand if I can
- IndianaBogart
- Dig Leader
- Posts: 651
- Joined: Wed May 21, 2008 10:25 am
- Location: ...listening to a tinny piano playing in the parlor downstairs....
Thanks Erri! That helped A LOT. What do you mean though, by what you said in the above quote? (If you want to PM me so it's kept secret that's fine. ;-) )to have this effect it's important also to pinch just under the ribbon so that the felt "learns" the curve that it needs to do... perhaps I'll explain that more in detail eventually. It's an old trick I learnt from a former member which has been kept in secret for long time.
The only thing that I still need a little help on is how would be the best way to flatten the back of the brim. (preferably without ironing)
It's really no secret for me, only a bit hard to explain.
You surely know about the famous "channel" under the ribbon which according to some legends would even involve stitching for a tighter fit on Ford's head.
Since it didn't appear anything like that in the screen used hat posted by the user "screenused" and that you will find as a sticky thread in this section of the forum... I made my own conclusions that it was just part of the bashing process which wasn't repeated for the following films of indy. Still this characteristic appears in most of the hats of Raiders (even the seaplane).
When I received this hat and I was preparing to bash it from screengrabs I obsered the curve of the side dents and I realised that it's only possible by pinching hard on a point just under the brim so that the dent is not a generic one but with a defined look, the curve that goes under the brim.
This creates the famous channel which is needed for a proper shape of the side dents and that appears on both sides and not only on one.
I hope I was clear enough on this, unfortunately I don't find it as something easy to explain and I really wish I could have made a video when I bashed my hat... Now that the info is public wait and see everyone coming in and saying "oh I knew that! Nothing new"
You can see "the channel" in this Adventurebilt of mine, just so you know what I'm referring too
http://i5.photobucket.com/albums/y157/erri_wan/a11.jpg
http://i5.photobucket.com/albums/y157/e ... d56010.jpg
and here
http://i5.photobucket.com/albums/y157/erri_wan/ABd1.jpg
and even better in these two
http://i5.photobucket.com/albums/y157/e ... 059caf.jpg
http://i5.photobucket.com/albums/y157/e ... 32d8d8.jpg
Anyway I'll make a little video for you soon enough. ;-)
- IndianaBogart
- Dig Leader
- Posts: 651
- Joined: Wed May 21, 2008 10:25 am
- Location: ...listening to a tinny piano playing in the parlor downstairs....
- IndianaBogart
- Dig Leader
- Posts: 651
- Joined: Wed May 21, 2008 10:25 am
- Location: ...listening to a tinny piano playing in the parlor downstairs....