Page 2 of 3
Re: Leather Bullwhip Build Log - Mod approved
Posted: Tue Aug 28, 2012 1:52 pm
by folkprophet
whiskyman wrote:Not sure if these are useful .-but here are some "in progress" pics I took a while back while working on a couple of whips.
10ft and 8ft overlays hanging - with braided 2nd bellies

Skiving overlay strands

Wristloops and falls

Diamond to Herrinbone transition (note unbound bolster)

Braiding overlay (again unbound bolster)

Good luck with your venture! Every whip is a learning experience. The best advice I ever got was from Joe Strain, when he advised me to cut everything by hand rather than use any lace cutter or such gizmo. You really get a better feel for the hide. He also told me it would take 30-40 whips before I was making good ones. He wasn't wrong! Even if I thought my 3rd whip was Ok! If you're serious about making quality whips, you must accept that it takes a lot of work!!
I realized I never replied to this. Thank you for the pics, support, and advice!
edit: I have some questions on the braiding of wrist loops? How many strands? How wide are the strands? What should the end width be (specifically for an Indy Style whip)? Thanks!
Re: Leather Bullwhip Build Log - Mod approved
Posted: Tue Aug 28, 2012 3:58 pm
by riku1914
For indy style whips, use 6 strands, and I use strands anywhere from 3-4mm wide. Anywhere around 1/2" total width is acceptable. I've made some a little under and some over, and it looks great anyway.
When doing wrist loop strands, either don't pare the strands at all pare them on the underside.
Re: Leather Bullwhip Build Log - Mod approved
Posted: Tue Aug 28, 2012 4:30 pm
by folkprophet
Strands cut, stretched, paired, and ready.
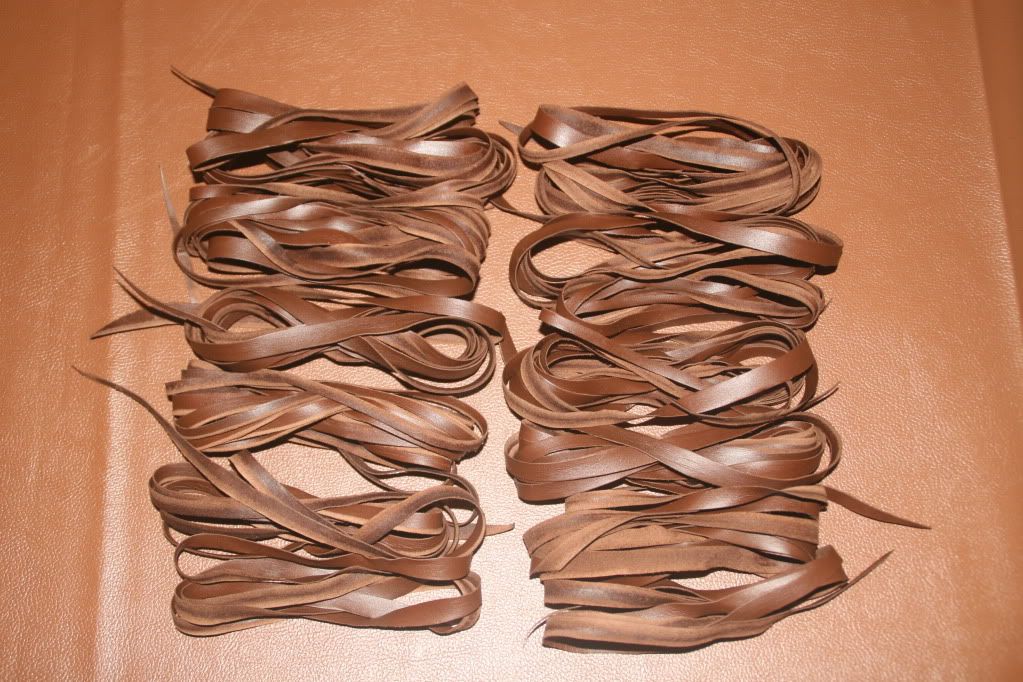
This did not take me as long as I expected it to. Maybe I'm getting better at this.

Re: Leather Bullwhip Build Log - Mod approved
Posted: Tue Aug 28, 2012 4:52 pm
by riku1914
When you're learning something new, take a break when you've been doing it for a while.For instance when I was first learning tying turks head knots, I'd drive myself nuts, and not stop trying until I was half-dead tired. Then I'd take a 30 minute break, eat something, then get the knot tied on my first try. Maybe that's what happened with you.
Question, why are you cutting all your strands out one at a time? I suggest you cut them out of a yoke. The only time I wouldn't cut them out of a yoke is if I were doing a high plait count and weren't tapering the strands. I'd just cut one solid long strand and cut it to length as needed. Doing the yoke also makes it easier to pare strands, split them, and grease them in that they are all attached to the yoke, and you don't have to anchor each strand somehow.
Re: Leather Bullwhip Build Log - Mod approved
Posted: Tue Aug 28, 2012 7:24 pm
by folkprophet
riku1914 wrote:When you're learning something new, take a break when you've been doing it for a while.For instance when I was first learning tying turks head knots, I'd drive myself nuts, and not stop trying until I was half-dead tired. Then I'd take a 30 minute break, eat something, then get the knot tied on my first try. Maybe that's what happened with you.
Question, why are you cutting all your strands out one at a time? I suggest you cut them out of a yoke. The only time I wouldn't cut them out of a yoke is if I were doing a high plait count and weren't tapering the strands. I'd just cut one solid long strand and cut it to length as needed. Doing the yoke also makes it easier to pare strands, split them, and grease them in that they are all attached to the yoke, and you don't have to anchor each strand somehow.
Hmm. Never thought to. One at a time seemed easier and made sense to my brain.
Knot question
Posted: Tue Aug 28, 2012 7:32 pm
by folkprophet
For the end knot, I have a few questions (not quite there yet, but am thinking about it).
1. How big should the final knot be (diameter) for an Indy Whip?
2. If the knot is that ^ big, what should the width of the strands be to do 3 passes. And how long will the strand for it need to be.
3. Is there some sort of equation for figuring strand width based on the diameter of the ball prior to tying the knot?
4. Same questions for the other knot...which I can't remember what it's called...but at the other end of the handle. It's smaller, but only has 2 passes, right? So the same strand width? And how long will I need the strand for that?
Thanks again all!
Re: Knot question
Posted: Tue Aug 28, 2012 7:52 pm
by riku1914
folkprophet wrote:For the end knot, I have a few questions (not quite there yet, but am thinking about it).
1. How big should the final knot be (diameter) for an Indy Whip?
2. If the knot is that ^ big, what should the width of the strands be to do 3 passes. And how long will the strand for it need to be.
3. Is there some sort of equation for figuring strand width based on the diameter of the ball prior to tying the knot?
4. Same questions for the other knot...which I can't remember what it's called...but at the other end of the handle. It's smaller, but only has 2 passes, right? So the same strand width? And how long will I need the strand for that?
Thanks again all!
1: Doesn't really matter. It's pretty much up to your personal preference. Some people like a small heel knot, others like myself like a large one to be able to grip really well. Personally I like the widest point on it to be at least 1.6 inches ( speaking inches because that's how the raiders whip heel knot was measured ) but more like 1.8 is most comfortable.
2: Can't say for sure. Depends on a lot of things. First of all, the knot has 4 bights and 3 passes. Second, it depends on how much of the knot you want to cover. You can have the entire heel covered, or have a lot or a little leather showing in the heel. You'll have to look at a lot of other knots, gauge how large they are and figure it out from there.
3: Probably figured it out from 2, didn't you? None that I have found. I've heard a few different ones but none of them worked because there are SO many variables with the knots.
4: Transition knot / ring knot . On the indy whips they again have 4 bights, but 2 passes , you are correct. No, not the same strand width. Typically for a 5x4 2 pass transition knot, the lace will be anywhere from 4-6 mm wide. It depends on the thickness of the whip.
5: ( I added one

) Lace length. Again it depends on a few things, but typically I cut my heel knot lace on a 5x4 3 pass heel knot 6-8 ft. long. I have plenty left over, but that's ok, I use it for whip handle keychain knots ( which I of course have to size down ). You could use it for something like a wrist loop, or if you have enough left over you can size it down for the transition knot ( that's what I used to do ).
For a 5x4 2 pass transition knot, I usually cut my lace 4-5 ft. long. I then have enough left over to do a whip handle keychain transition knot, and then have some left over. So I would suggest cutting your lace 4 ft. long and seeing how much you have leftover. That's enough so that you can ensure you have enough, but not have too much waste if there's bunches left over.
Cutting them all at once also helps with consistency ( speaking of plaited layers now ). You don't get to cut the whole strand in one go, but since they are at the same time you're able to keep track of things easier. There's nothing wrong with one at a time, it can work, I'm just telling you what helps me best.
Re: Leather Bullwhip Build Log - Mod approved
Posted: Tue Aug 28, 2012 7:58 pm
by Canuck Digger
One of the reasons for cutting strands out of a keeper is so that in the case of the bellies, the keeper is wrapped and tied around the handle, in the case of the overlay, it's so the keeper can be folded over the end knot foundation (the lead); by folding the keeper over the end knot foundation, what happens is that the overlay strands are pulling the keeper toward the tip of the whip (by virtue of the strands being plaited with tension...), and the other end of the keeper is pulled OVER the end of the spike and then toward the tip as well. So what is going on is that the two ends of the keeper are pulled in opposite directions, so once the keeper is tied on and then further secured with a few tack, it solidifies the lead foundation. This tension is critical in securing the lead, otherwise the whole knot will end up moving around the spike. This brings me to a small detail which is never spoken of but which I'm sure everybody pays some attention to: the head of the spike. By pulling the keeper over the head of the spike and the lead, you are pushing the leather against the head and this is not always a smooth clean surface. I always make sure I remove any sharp edges or overly rough areas from the head of the spike to it doesn't end up cutting through the leather. Since the leather will not be moving, there isn't going to be too much danger of this happening, but it's something you do at the same time as you are rounding off the tip of the spike. You can also glue on a small leather disk to further protect the keeper if you wish, but that may not be necessary if you smooth out the head of the spike beforehand. When I plait the second belly over the handle, I put the lead on over the keeper of the first belly and tie the keeper of the second belly over the lead, as you would do with the overlay keeper. I find that the two holding on to the lead this way makes a very solid foundation that does not move at all, but it does add bulk and so if you are making a whip, like an Indy whip, with a wrist loop, which adds even more bulk to the end knot, I would say to NOT do it this way because it will make the end knot too big and you won't be able to put a whole lot of lead to counter balance the weight of the thong. But if you are making an American-style bullwhip with no wrist loop, then it is a possibility, but you need to plan ahead and make sure that you figure out all the layers so things aren't too big.
The size of the end knot foundation depends on two things; the length (and so the weight) of the whip to balance, and the size that can be comfortably held in the hand-there's just so much that can be held in the average hand. So anything that can be comfortably held in the hand is ok, with the average being between around 1.5".
For the average three-pass turk's head covering knot lace, I would say that between 7-9mm is probably alright for the average knot size. Having said that, the lace should be very well stretched prior to weaving the knot because the further along you go in your weaving the turk's head, the knot tightens up and there is more pressure exerted on the lace as you weave it through and if the lace isn't stabilized, it will thin down and you will end up with holes in the knot. Also always leave this lace dry, do not put any grease or plaiting soap on it because a dry strand stays put a lot better than one who is greased, which tends to come loose. Also, I do not bevel/skive this lace at all. Some do, but I find I get a better result but not skiving it and simply rolling the knot well when it's done. Because the foundation is made of lead it is malleable and can be shaped by gentle hammering to further refine the shape of the end knot.
The ring knot at the end of the handle, the two-pass knot... can be tied with a lace of 5-6mm wide. Again, dry and un-skived but well-stretched.
I'm sure there could be a mathematical equation to figure this stuff out, but I don't know of one.
Anyhoo that's how I do it.
Cheers,
Franco
Re: Leather Bullwhip Build Log - Mod approved
Posted: Tue Aug 28, 2012 8:10 pm
by folkprophet
Hmm. I guess I should have asked it this way:
What would be the size of the knot for a screen accurate Indy whip? Take comfort out of the equation--how can I make it look like Indy's?

Re: Leather Bullwhip Build Log - Mod approved
Posted: Tue Aug 28, 2012 8:28 pm
by Canuck Digger
I believe one of Indy's whip had a end knot 1.68" wide by 1.70" long.
Re: Leather Bullwhip Build Log - Mod approved
Posted: Tue Aug 28, 2012 9:44 pm
by riku1914
I only remember 1.68" wide, not the length, so Franco is more than likely right there

Re: Leather Bullwhip Build Log - Mod approved
Posted: Tue Aug 28, 2012 10:04 pm
by folkprophet
The commencement has commenced:
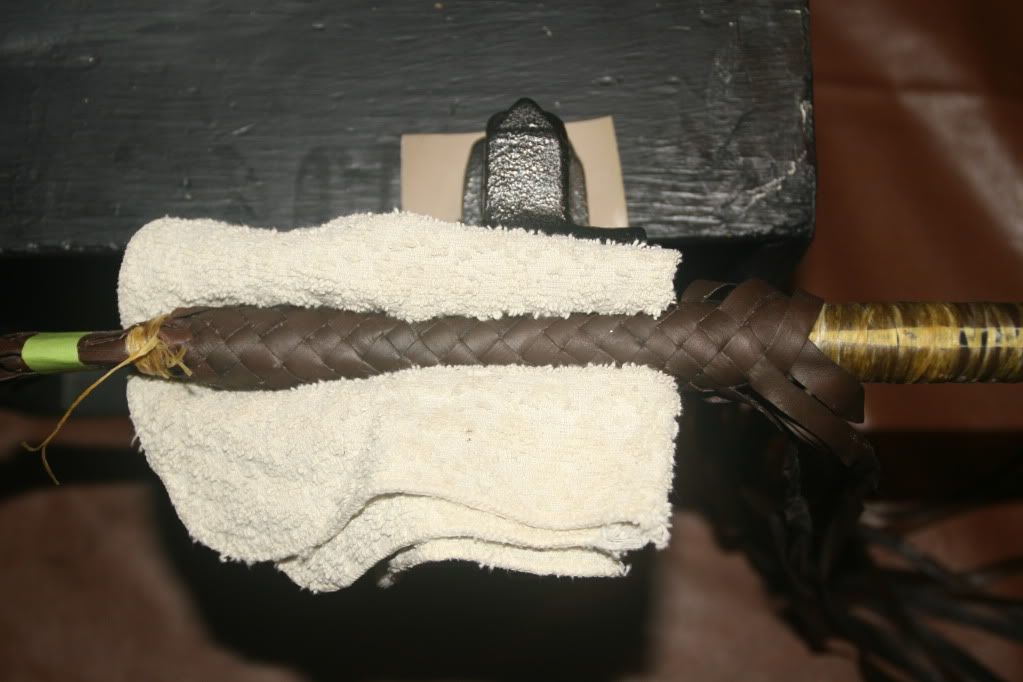
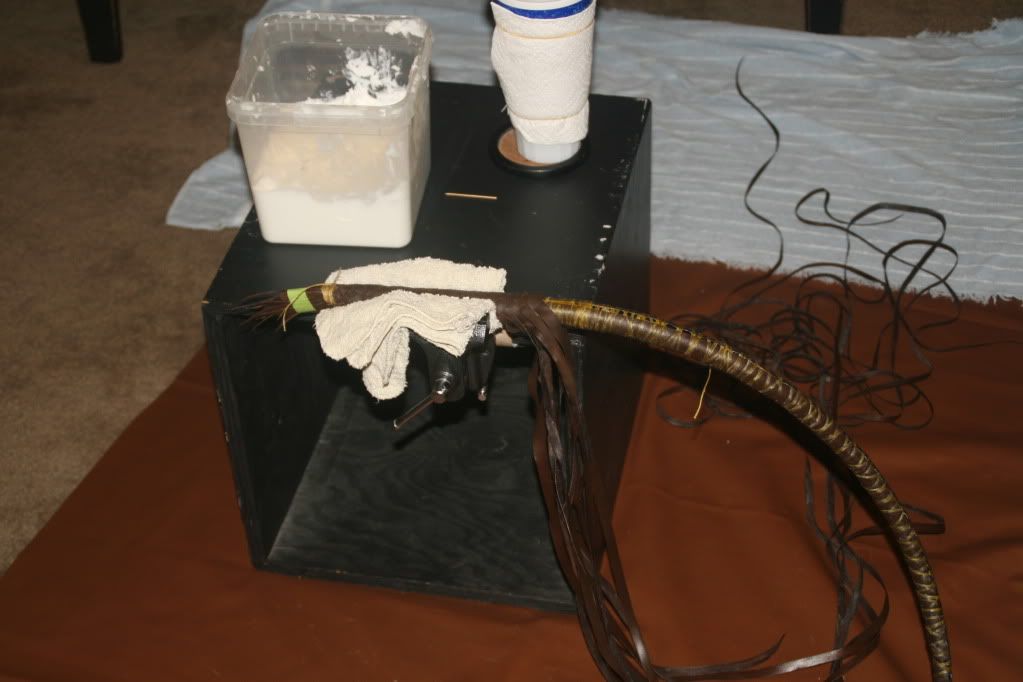
Re: Leather Bullwhip Build Log - Mod approved
Posted: Tue Aug 28, 2012 10:10 pm
by riku1914
Ok I see something that can seriously benefit you and your future whip making. Plait from something flexible, not a vice. You could even put the yoke/tail end of the strands into the vice so that's it's a flexible connection. Why? Because it doesn't allow for error. Your seams will twist at first, they will likely twist for several whips or more, BUT you'll at least know which side you're pulling too hard on. When you plait from a vice, the seams won't be badly twisted at first. BUT, as the whip breaks in, because of uneven tension on the strands, the seams will shift to what is more natural for them. Twisty seams on a whip is a no-no, whether it's now or later.
edit: also, if you still want to plait from a vice, keep the vice much further away from the plaiting. That's because when you tighten a strand, the strand will tighten 2 and sometimes even 3 sets up, and that's a very good thing. If the vice is holding the strands, the whip won't tighten properly, become tight in some areas, squishy in others, and it won't crack well, be accurate, anything that is really wanted in a whip.

Re: Leather Bullwhip Build Log - Mod approved
Posted: Tue Aug 28, 2012 11:52 pm
by folkprophet
riku1914 wrote:Ok I see something that can seriously benefit you and your future whip making. Plait from something flexible, not a vice. You could even put the yoke/tail end of the strands into the vice so that's it's a flexible connection. Why? Because it doesn't allow for error. Your seams will twist at first, they will likely twist for several whips or more, BUT you'll at least know which side you're pulling too hard on. When you plait from a vice, the seams won't be badly twisted at first. BUT, as the whip breaks in, because of uneven tension on the strands, the seams will shift to what is more natural for them. Twisty seams on a whip is a no-no, whether it's now or later.
edit: also, if you still want to plait from a vice, keep the vice much further away from the plaiting. That's because when you tighten a strand, the strand will tighten 2 and sometimes even 3 sets up, and that's a very good thing. If the vice is holding the strands, the whip won't tighten properly, become tight in some areas, squishy in others, and it won't crack well, be accurate, anything that is really wanted in a whip.

As far as the too close goes, I had just moved it there for the picture. However, I had heard that it's better to plait from a hook...but I'd never known why. That explains it.
I'm actually very frustrated by one of the strands which stretched out even more and is too small now. So frustrated that I'm considering unplaiting where I've got to (I've got about 3 feet down), buying another dark hide, cutting a new strand, and starting over.

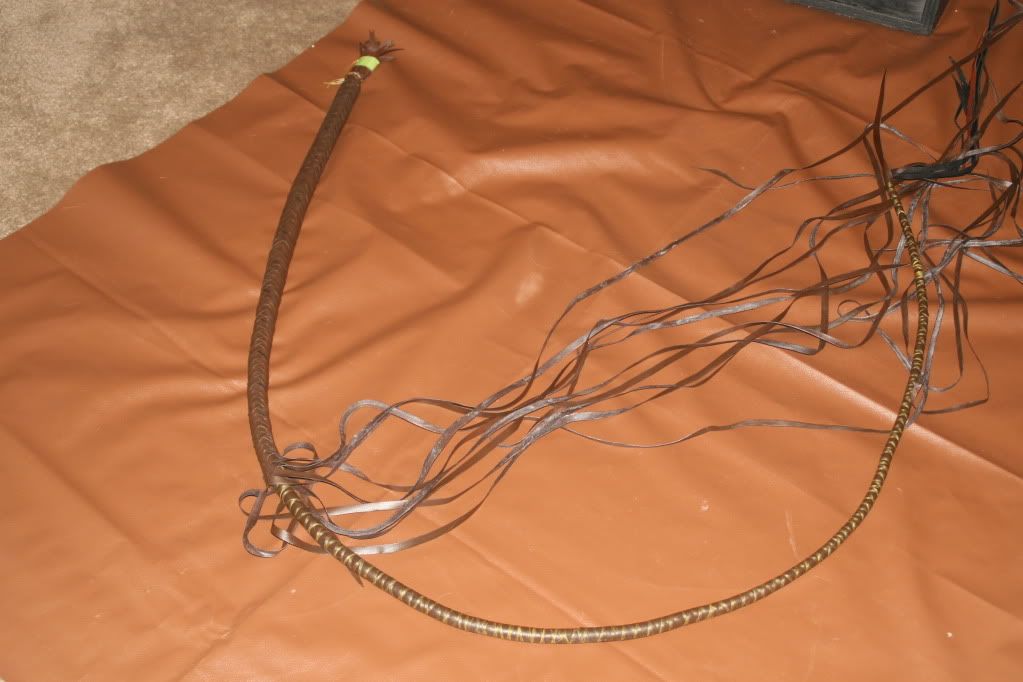
Re: Leather Bullwhip Build Log - Mod approved
Posted: Wed Aug 29, 2012 2:15 am
by Canuck Digger
Ok if you can splice in a new and wider strand, do it.
Try to switch the plaiting around so you are plaiting from the other side, so the bolster seem faces away from you, like in Whiskey man's pics... this way when you start dropping strands at the end of the plaited belly, the bolster will naturally fall on top of the strands instead of you having to hold it up there all the time...
It's a pain but look at it as the price of education...
Regards,
Franco
Re: Leather Bullwhip Build Log - Mod approved
Posted: Wed Aug 29, 2012 11:04 am
by folkprophet
Canuck Digger wrote:Ok if you can splice in a new and wider strand, do it.
Try to switch the plaiting around so you are plaiting from the other side, so the bolster seem faces away from you, like in Whiskey man's pics... this way when you start dropping strands at the end of the plaited belly, the bolster will naturally fall on top of the strands instead of you having to hold it up there all the time...
It's a pain but look at it as the price of education...
Regards,
Franco
Right. I had noticed that after I had tied the bolster on with the seam facing up--that is, in relation to the natural curve of the whip, that I've tried to keep the same throughout...because I read somewhere I think that I should.
K. Thank you.
Re: Leather Bullwhip Build Log - Mod approved
Posted: Wed Aug 29, 2012 11:16 am
by riku1914
It actually doesn't matter which way you have the seam facing as long as it's in line with one of the plaiting seams. We're just talking about placing it so that it is easier to keep in line when plaiting over it.
You do want all the layers lined up, per se , but it wouldn't be a bad thing to plait the first belly, plait the second belly from the opposite side ( everything attached the same way just plaited 180 degrees from the way you plaited the first ) then plait the overlay in the same direction you did the first belly. In this case, all the seams will still be lined up, but the natural curve the whip would have wouldn't be as extreme as if you plaited every layer the same direction.
Overlay
Posted: Wed Aug 29, 2012 5:53 pm
by folkprophet
Well, my 8 foot whip ended up being 7 feet.

Apparently 12 foot strands isn't enough. I forgot to look at the back of medallion.
Anyhow, here it be. Not rolled yet. And I'm waiting on the falls (probably arrive Fri). So on to the knots.
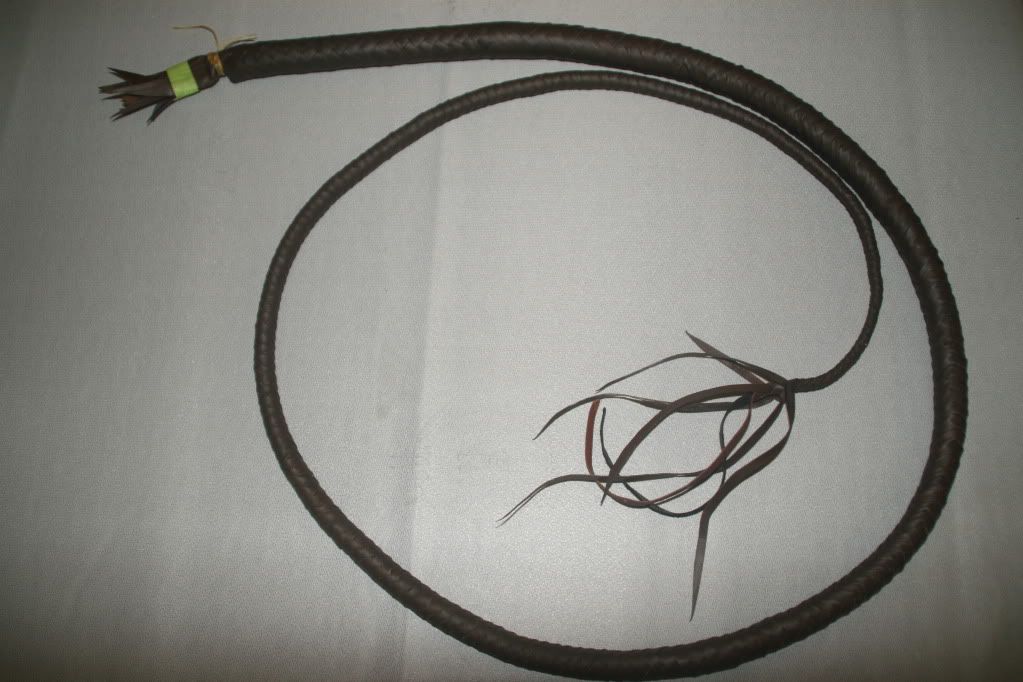
edit: Bah...that's a poorly lit picture. Sorry.
Re: Leather Bullwhip Build Log - Mod approved
Posted: Wed Aug 29, 2012 6:16 pm
by riku1914
Were your strands 12 ft. before or after stretching? If you cut them at 12 ft. before stretching, then you have plenty of length. If you're trying to get 12 ft. before stretching ( say for instance you cut it 11 ft. and it stretches to 12 ) then you probably wouldn't have enough length.
You may want to back up the last foot or two and drop strands quicker. I say this because the last two or so are there only 6 inches or so from the end. I like to have dropped strands in a minimum or 9 inches.
Plus if you do that you can taper the whip a little quicker there for the end to make up for the lost length.
Don't roll it until you do the knots! You won't be able to roll some areas properly because of them being in the way. Also it will flex the transition in a weird way and start to wear it out before you have even cracked it!
Re: Leather Bullwhip Build Log - Mod approved
Posted: Wed Aug 29, 2012 6:38 pm
by folkprophet
riku1914 wrote:Were your strands 12 ft. before or after stretching? If you cut them at 12 ft. before stretching, then you have plenty of length. If you're trying to get 12 ft. before stretching ( say for instance you cut it 11 ft. and it stretches to 12 ) then you probably wouldn't have enough length.
They were 12 before stretching. I'm quite surprised I only got 7 feet (actually, I'm one inch short of 7 feet). I experience being a bit short with the vinyl...I was like 4 inches short of 8 feet, but the vinyl doesn't stretch...or at least hold it's stretch. Maybe I'm not stretching right. I used the method from Bernie's youtube vids where you wrap it around a hook and pull. I did this twice for each strand and pulled on them quite hard.
riku1914 wrote:You may want to back up the last foot or two and drop strands quicker. I say this because the last two or so are there only 6 inches or so from the end. I like to have dropped strands in a minimum or 9 inches.
Plus if you do that you can taper the whip a little quicker there for the end to make up for the lost length.
Yeah...I'm thinking about it. The taper for the end was based on having another foot. I was going from a 5 strand core, to a 4, to a 3, to a 2...nice and smoothly. I ended up having to cut them all off shorter and got a steeper taper at the end than I wanted. Plus...I actually braided the second belly a bit longer than 6 feet just because I had the strand lenght. I think I'll undo the overly, unbraid some of the 2nd belly and then redo it.
riku1914 wrote:Don't roll it until you do the knots! You won't be able to roll some areas properly because of them being in the way. Also it will flex the transition in a weird way and start to wear it out before you have even cracked it!
I don't understand. The first and second sentences seem to be in direct conflict with each other. Don't roll until the knots are done because they'll get in the way? Do you mean roll it like wrapping it in a circle? It was very loose in that picture and was, pretty much the natural curve of it.
Knot foundation help
Posted: Wed Aug 29, 2012 6:46 pm
by folkprophet
So I've read/watched several methods of doing the foundation for the end knot. So what do you recommend and why? I know lead sheet is one method...to add weight...not sure I'll need that with this whip...but still, I'd like the theories, etc...
Thanks again all!!
Re: Knot foundation help
Posted: Wed Aug 29, 2012 6:54 pm
by folkprophet
folkprophet wrote:So I've read/watched several methods of doing the foundation for the end knot. So what do you recommend and why? I know lead sheet is one method...to add weight...not sure I'll need that with this whip...but still, I'd like the theories, etc...
Thanks again all!!
Speaking of which, where does one acquire lead sheet? Is it something that needs to be special ordered, or can it be picked up at a hardware store?
Re: Leather Bullwhip Build Log - Mod approved
Posted: Wed Aug 29, 2012 7:19 pm
by riku1914
Go ahead and use lead. David Morgan did on all his bullwhips.
BTW, I wouldn't stretch my strands that way if I were you. I've used it lots and it doesn't do it thoroughly enough. Have you seen the how it's made segment for whips? Stretch your strands how Paul did, and do it very thoroughly:
http://www.youtube.com/watch?v=1k5WVYu5GXY" onclick="window.open(this.href);return false;
Re: Leather Bullwhip Build Log - Mod approved
Posted: Wed Aug 29, 2012 8:06 pm
by folkprophet
riku1914 wrote:Go ahead and use lead. David Morgan did on all his bullwhips.
BTW, I wouldn't stretch my strands that way if I were you. I've used it lots and it doesn't do it thoroughly enough. Have you seen the how it's made segment for whips? Stretch your strands how Paul did, and do it very thoroughly:
http://www.youtube.com/watch?v=1k5WVYu5GXY" onclick="window.open(this.href);return false;
I hadn't seen that. Thanks!
Re: Leather Bullwhip Build Log - Mod approved
Posted: Wed Aug 29, 2012 8:48 pm
by riku1914
I still have it on the DVR from the original air date

Re: Leather Bullwhip Build Log - Mod approved
Posted: Wed Aug 29, 2012 10:36 pm
by folkprophet
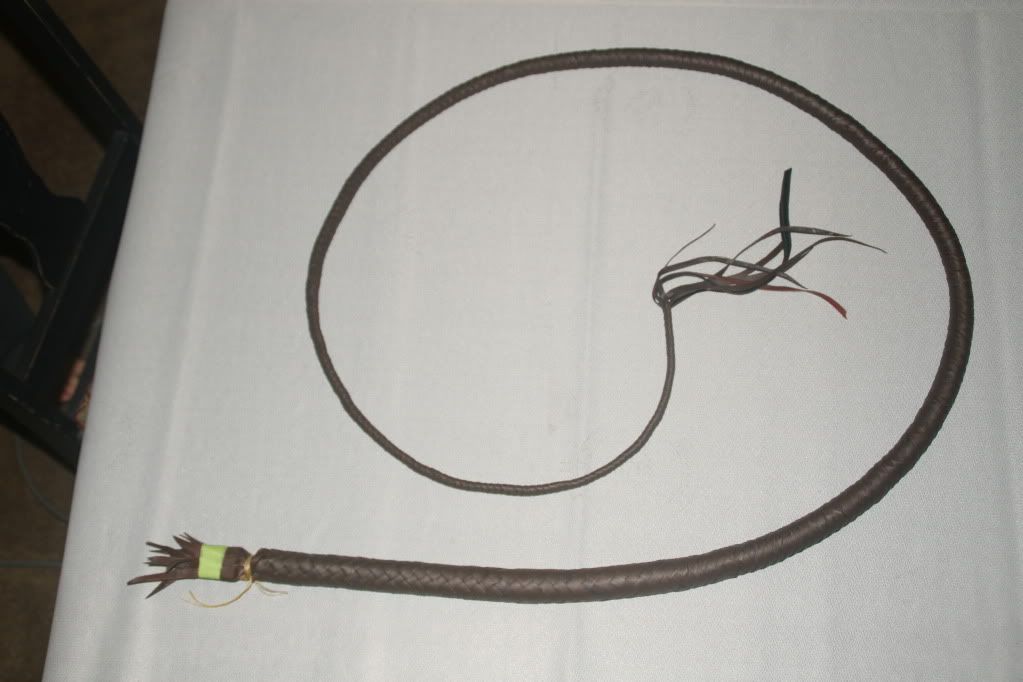
I do believe that this is an improvement:
Re: Leather Bullwhip Build Log - Mod approved
Posted: Wed Aug 29, 2012 10:38 pm
by riku1914
Yes, it still tapers quickly but it's a good improvement over how it was. I don't think you could get it much better though at this point.

What's the dimensions?
Re: Leather Bullwhip Build Log - Mod approved
Posted: Wed Aug 29, 2012 11:18 pm
by folkprophet
riku1914 wrote:Yes, it still tapers quickly but it's a good improvement over how it was. I don't think you could get it much better though at this point.

What's the dimensions?
Length: 7' 1"
Handle Diameter: 27mm
Tip Diameter: 8mm
The tip is actually a bit flat around the strands there. So one way it measures 7 and the other 9. I need to try to get it round. Not sure how though because I plaited it so tight that it curls quite severely. I thought that would squish the leather round.
Edit: I agree on not getting it much better. The inner bellies were based on another foot of whip to taper slowly.
Re: Leather Bullwhip Build Log - Mod approved
Posted: Wed Aug 29, 2012 11:53 pm
by folkprophet
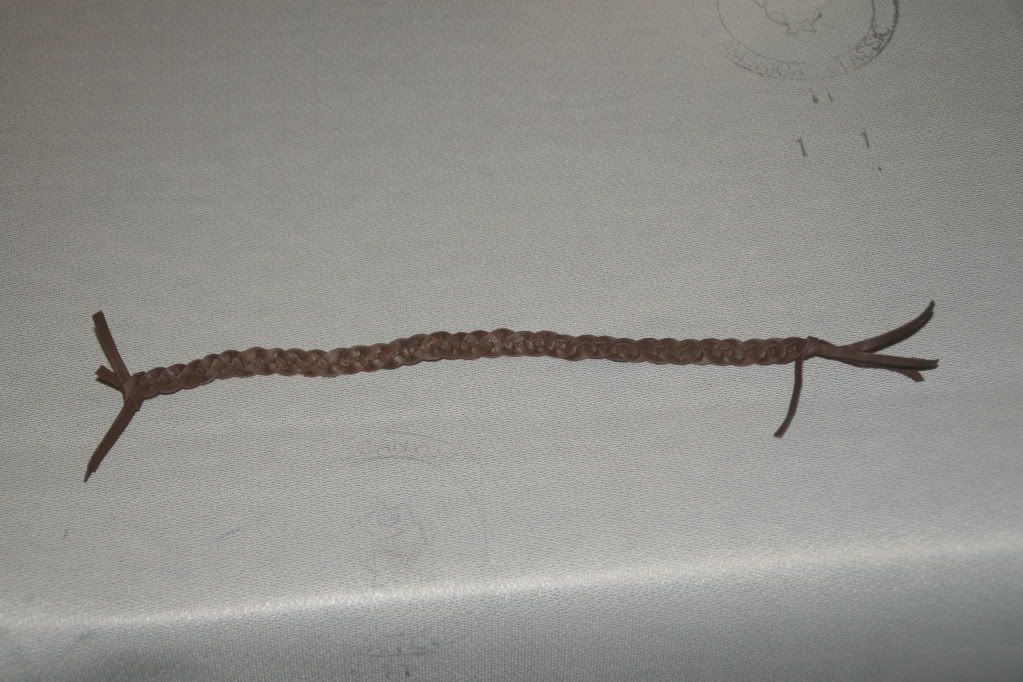
Here's my first shot at a wrist strap. I used the rest of my dark brown leather...and it turned out too short (about 11 inches here--I think I need more like 14) so I guess the strap will be a different color (which the knots were going to be anyway, so it's all good). As to the quality, technique, etc... I have no idea what I'm doing here.

Re: Leather Bullwhip Build Log - Mod approved
Posted: Thu Aug 30, 2012 5:51 am
by Canuck Digger
Hey not too bad for a first leather whip all things considered!
Roll it BEFORE you put the knots on. Then, once the knots are all tied on, roll the knots. One thing, try to tie off each end of the whip so when you roll it it doesn't thrash about like a flailing snake. The flat at the tip you have is the result of how you formed your core and is what happens when flat strands are left to their own devices; they stack up one on top of the other and form a sort of square shape. By running a loop of leather up and down over your core strands as a unit, so all together, before you plait them will round them into a roundish shape that is easier to roll round and is more accurate. The way to minimize this now that you do have it, is to start rolling at the handle end where it is very round and you will feel it when you hit a more "square" section so what you do then is you use the round part that precedes the square one and sort of "push" the roundness into the square... it sounds weird saying it like this but imagine you have a roll of Play-doh instead of a whip and one end is round and the other is flat... well if you try to roll the flat part first it won't happen, BUT if you start at the round end and roll the roundness into the flat part, it will push it like a wave that makes a tunnel... I can't explain it better than that right now, but start with the handle end first and you'll see what I mean when you get to the other end.
Lead can be found in certain roofing suppliers but because it is toxic, not many still use it, but try this place:
http://www.rotometals.com/product-p/leadsheet2pound.htm" onclick="window.open(this.href);return false;
3M also sells a lead-alloy tape:
http://www.amazon.com/3M-Lead-Foil-Silv ... =lead+tape" onclick="window.open(this.href);return false;
The lead alloy tape might be a bit lighter, not sure, due to the other metals, but it's a convenient way to do it as it is self-adhesive...
I would roll a 1" wide strip to about 1" thick, but this is with the idea that the overlay is cut with a keeper that will be folded over it... In your case I'm not sure, but worst comes to worst, just build it up with a leather strip and sinew and a few tacks and make your Turk's head knot over that, if you don't want to bother with the lead. It IS your first leather whip after all, it's OK if not everything is perfect...
Cheers,
Franco
Re: Leather Bullwhip Build Log - Mod approved
Posted: Thu Aug 30, 2012 7:53 am
by riku1914
Just to let you know, if you plait tight enough it will be 95% round before rolling. I know you may think you're plaiting tight right now ( I did at this point ) but you're not. I can say that because if one side of the whip measure 9 and the other 7, then that's proof of it there. The whip not being really tight won't hurt it, it'll just be really loose. When you are plaiting looser, definitely take Franco's advice about rounding the sections like you do a fall before you plait over it. That's what I used to have to do. Now the only thing I round is the core, and that's just to get it to fold in on itself.
Your wrist loop looks like it's a 4 plait, did you do that on purpose?
Re: Leather Bullwhip Build Log - Mod approved
Posted: Thu Aug 30, 2012 10:21 am
by folkprophet
riku1914 wrote:Your wrist loop looks like it's a 4 plait, did you do that on purpose?
Yes...er...no... I have no idea what the wrist loops are supposed to be. But it didn't look quite right when I finished it. 6 plait? 8 plait?
Re: Leather Bullwhip Build Log - Mod approved
Posted: Thu Aug 30, 2012 2:44 pm
by riku1914
You can make them 3,4,5,6,7,8,9,10 etc... 4-6 is most common, and david morgan indy style whips have 6 plait wrist loops.
Re: Leather Bullwhip Build Log - Mod approved
Posted: Thu Aug 30, 2012 3:01 pm
by folkprophet
riku1914 wrote:You can make them 3,4,5,6,7,8,9,10 etc... 4-6 is most common, and david morgan indy style whips have 6 plait wrist loops.
If David Morgon does it, it's good enough for me.

Re: Leather Bullwhip Build Log - Mod approved
Posted: Thu Aug 30, 2012 3:46 pm
by Marhala
riku1914 wrote:I used to bind over bolsters almost exclusively, then I tried Franco's suggestion about not doing it and the whip turned out smoother, easier to plait over, and better working, so I never went back. Also, when I say easier to plait over, I don't just mean the smoothness of the plait, I also didn't have to put as much effort into the pull to fully tighten the strand.
I find this observation very interesting, as I once told Jeremy that I didn't like the thread biting into the braided bellies. I preferred to bind the bolsters in order to avoid "damaging" (how much damage, I'm not sure, but felt that it damaged them somehow). I have never had any problems plaiting over the bound bolster. Perhaps the sinew is thicker than the waxed thread I use?

You're doing great folkprophet! Tackling such a job as making a bullwhip is not easy, but you're doing great!
Aldo.
Re: Leather Bullwhip Build Log - Mod approved
Posted: Thu Aug 30, 2012 3:51 pm
by riku1914
Marhala wrote:riku1914 wrote:I used to bind over bolsters almost exclusively, then I tried Franco's suggestion about not doing it and the whip turned out smoother, easier to plait over, and better working, so I never went back. Also, when I say easier to plait over, I don't just mean the smoothness of the plait, I also didn't have to put as much effort into the pull to fully tighten the strand.
I find this observation very interesting, as I once told Jeremy that I didn't like the thread biting into the braided bellies. I preferred to bind the bolsters in order to avoid "damaging" (how much damage, I'm not sure, but felt that it damaged them somehow). I have never had any problems plaiting over the bound bolster. Perhaps the sinew is thicker than the waxed thread I use?

You're doing great folkprophet! Tackling such a job as making a bullwhip is not easy, but you're doing great!
Aldo.
Actually the sinew is flat. I think that may be the reason the thread is biting into the leather, because of how it's shaped and how it's not a solid piece. If you took a piece of sinew and wrapped it around your finger and pull, then compared it with a piece of regular nylon thread ( like you use ) the nylon thread would hurt more because it's sort of abrasive as compared to the smooth and flat sinew.. It's hard to explain but hopefully you would understand.
BTW, I've undone a really tight set of binding that was over a belly and it hadn't hurt the leather at all.
Re: Leather Bullwhip Build Log - Mod approved
Posted: Thu Aug 30, 2012 4:09 pm
by folkprophet
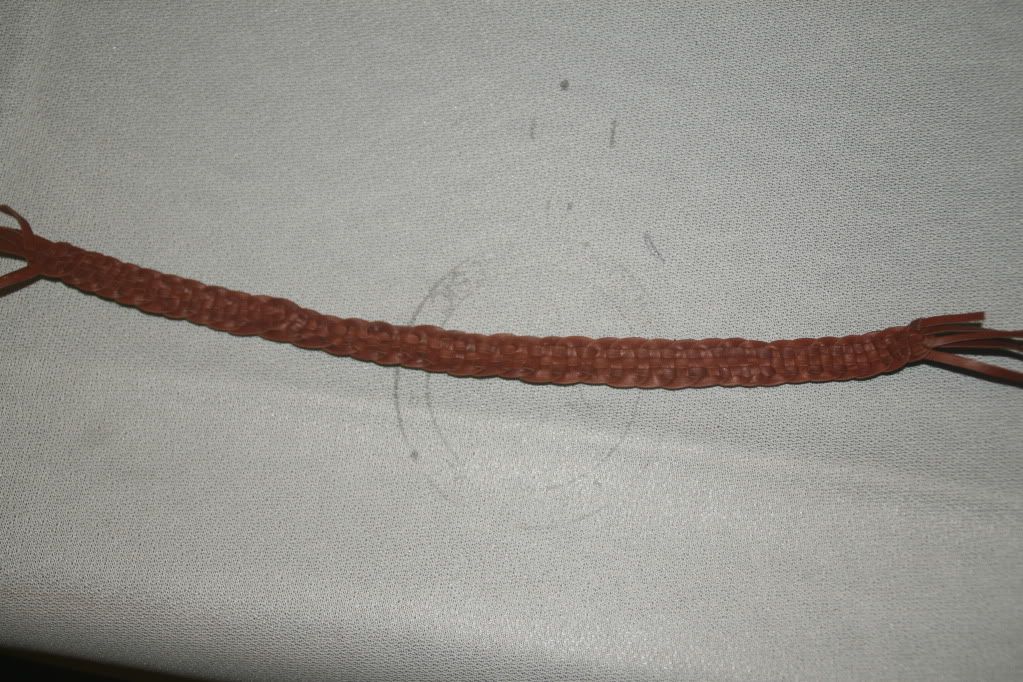
2nd attempt at wrist strap...this time a 6 plait. Still just making this part up. I cut 12 feet of strand and ended up with 12" of braid (started with 6 two foot strands. Apparently the ratio of length pre to post braiding for flat is higher).
Re: Leather Bullwhip Build Log - Mod approved
Posted: Thu Aug 30, 2012 4:09 pm
by folkprophet
Marhala wrote:You're doing great folkprophet! Tackling such a job as making a bullwhip is not easy, but you're doing great!
Thanks. I'm really enjoying it!
Re: Leather Bullwhip Build Log - Mod approved
Posted: Thu Aug 30, 2012 4:15 pm
by Marhala
I understand what you say, Jeremy. Being flat, it can't cut as easily as a single thread. Pressure distributes along the surface. The good side of using one thread is that it sinks deeper into the leather, binds tighter (perhaps?), and sits flatter after rolling it. Doesn't David use thread instead of artificial sinew?

I know Franco has already addressed the questions of lace width for knots. I'll share mine, just for fun:
Transition knot: 4.5mm
Turk's Head (5p 4b, three-pass): 6.5-7mm
The width for the strands for the wristloop is 4.5mm too.
BTW, that pattern for the wristloop looks nice, folkprophet! I like it. It is different from the regular Indy whip, but is good looking.
Aldo.
Re: Leather Bullwhip Build Log - Mod approved
Posted: Thu Aug 30, 2012 4:24 pm
by riku1914
It's interesting what you did with the wrist loop. It's not really a flat plait, it's just strands weaved between one another. Get someone that knows how to braid hair ( usually just 3 strands ) and have them teach you how to braid 3 strands. Then that is very simply adapted to 4+ strands.
What you did isn't wrong, it's just different.
Oh about David, he doesn't use it for binding, just attaching belly sets which I doubt he did super tight like most of us do.
I'm not sure about it binding tighter, i'd really find that difficult to believe ( because I have used regular thread before for a binding). If anything I think it would bind about the same but cause, as you observed, some scratching or even biting into the leather.
Besides though, you told me you only bind for about an inch past the transition anyway so it's not a huge deal in your case

I've bound out as far as 12 inches on my whips and really like how they turn out ( it's not a solid bind the whole way, it's closed loop then transition into multi layered criss cross that slowly eases off for a transition that is really stiff next to the handle and looser as it goes further out ).
Re: Leather Bullwhip Build Log - Mod approved
Posted: Thu Aug 30, 2012 9:24 pm
by folkprophet
Marhala wrote:I understand what you say, Jeremy. Being flat, it can't cut as easily as a single thread. Pressure distributes along the surface. The good side of using one thread is that it sinks deeper into the leather, binds tighter (perhaps?), and sits flatter after rolling it. Doesn't David use thread instead of artificial sinew?

I know Franco has already addressed the questions of lace width for knots. I'll share mine, just for fun:
Transition knot: 4.5mm
Turk's Head (5p 4b, three-pass): 6.5-7mm
The width for the strands for the wristloop is 4.5mm too.
BTW, that pattern for the wristloop looks nice, folkprophet! I like it. It is different from the regular Indy whip, but is good looking.
Aldo.
I had no idea what I was doing. Glad it looks nice. I do want to learn to do it "correctly" though.
Re: Leather Bullwhip Build Log - Mod approved
Posted: Thu Aug 30, 2012 9:28 pm
by folkprophet
riku1914 wrote:Get someone that knows how to braid hair ( usually just 3 strands ) and have them teach you how to braid 3 strands. Then that is very simply adapted to 4+ strands.
You might think it's simply adapted, but I actually do know how to braid 3 strands. Apparantly it does not adapt to 6 strands as simply as you might think.

Re: Leather Bullwhip Build Log - Mod approved
Posted: Thu Aug 30, 2012 9:47 pm
by folkprophet
I put my brain to the problem and came up with this:
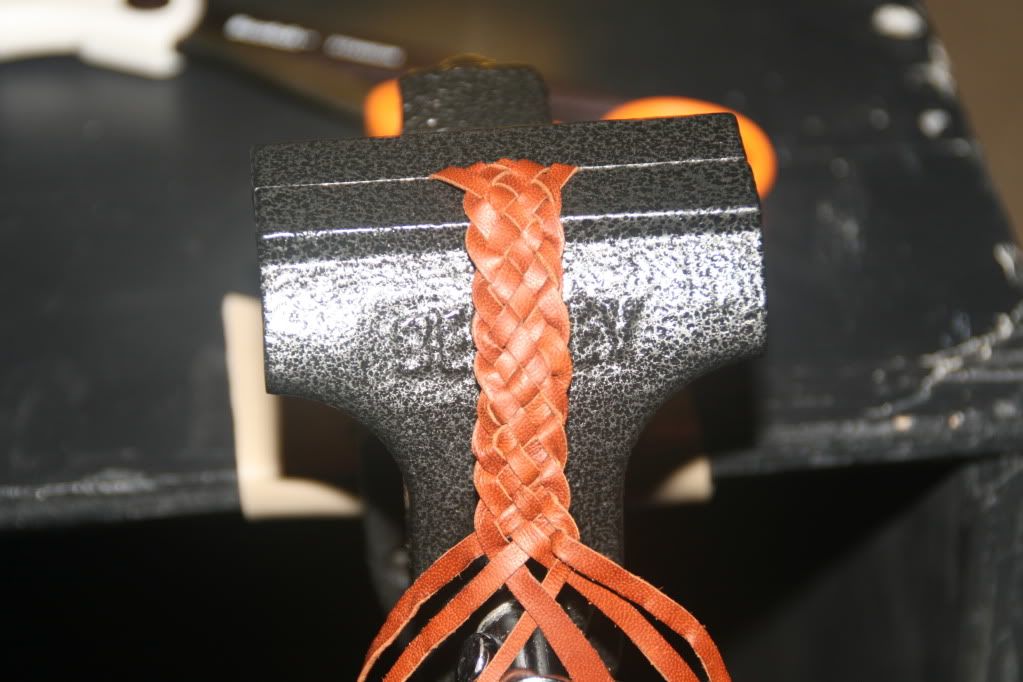
Does this look more like it?

Re: Leather Bullwhip Build Log - Mod approved
Posted: Thu Aug 30, 2012 10:13 pm
by Canuck Digger
YES! That is exactly it! Well done!
Try to make is at least 14" long if you can, though if the strands are already cut... The average wrist loop is 6-6.5 inches long ( so the length X 2 because you are folding it over...) + 2 inches to tie it to the end knot foundation (so about one inch each side) = 14-14.5" (I round it up to 15" and snip excess if I have to).
I was about to post a diagram of the wrist loop but you nailed it! A few points to keep in mind: Once it is finished it too needs to be rolled, so find something round and smooth like a rolling pin or even a bottle (just make sure it doesn't break in your hands as you are rolling... so if you use a bottle maybe wear leather gloves). It's up to you whether or not you shellac it. If you don't then it will be pliable right away so not a bad thing, and if you do it will have the same sheen as the rest of the whip (assuming you shellac the rest as well) and it will become a little bit more rigid, which isn't a bad thing necessarily, just different. If you do shellac it, you will find it easier to apply the shellac to the loop as a flat braid before you put it on the whip. It will fold in two no worries there but trying to shellac something like this once it's on the whip is a bit more difficult, though not the end of the world but why make life harder than it needs to be?
Keep your tension even so the plaiting has straight edges.
Well done,
Franco
Re: Leather Bullwhip Build Log - Mod approved
Posted: Thu Aug 30, 2012 11:53 pm
by riku1914
A good thing to "roll" a wrist loop is the back side a hook ( the side facing away from you when plaiting from one ). It works perfectly for me, and Aldo is the one that first brought it to my attention.
I said it was easily adapted because that's all I knew how to do before I did ANYTHING whip making related, was a flat 3 strand braid. What I knew from that I adapted easily to a 4 and 5 plait, then when I realized I couldn't make whips with that, set out to learn round plaits.
Re: Leather Bullwhip Build Log - Mod approved
Posted: Fri Aug 31, 2012 12:32 am
by folkprophet
Knot the first:
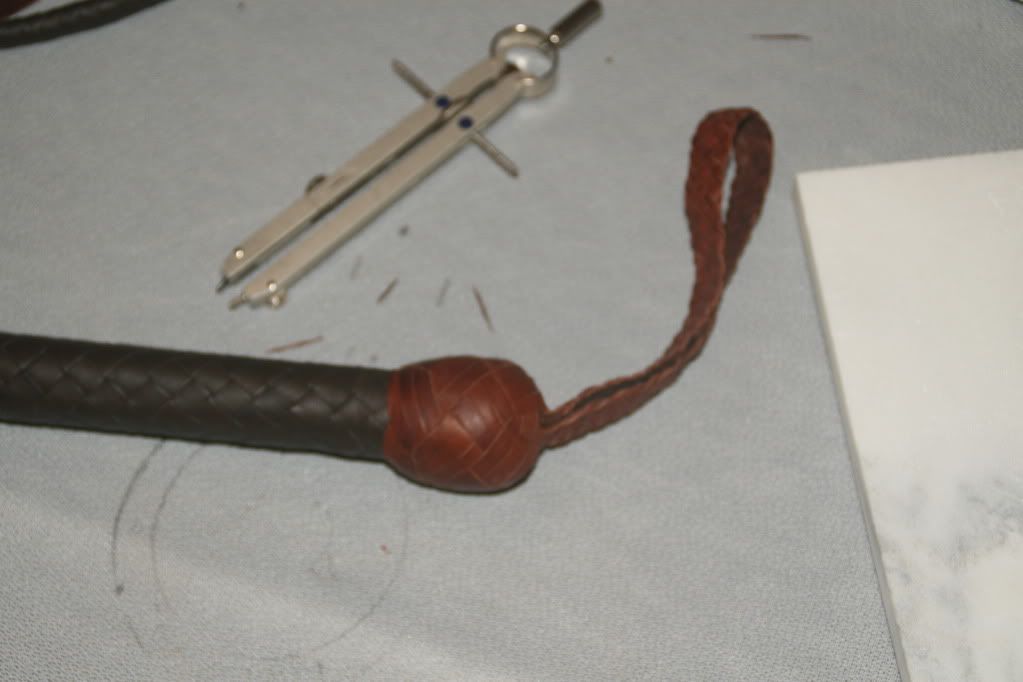
My camera seems to be having focus issues.
Re: Leather Bullwhip Build Log - Mod approved
Posted: Fri Aug 31, 2012 1:20 am
by folkprophet
Knot the second:
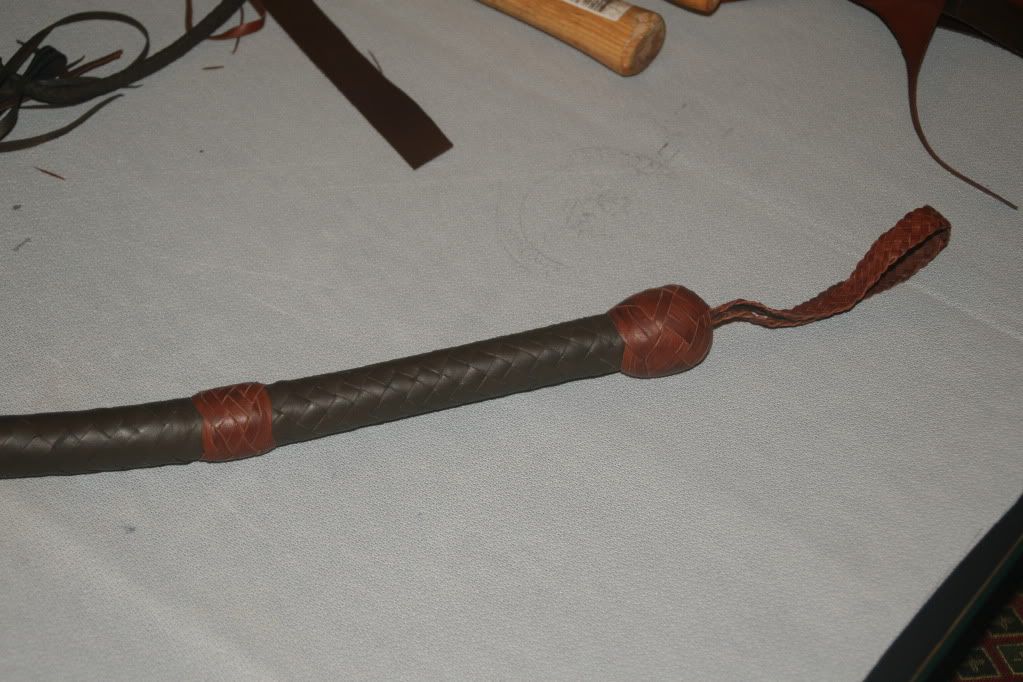
Now I just need to get my falls and popper thread (should arrive tomorrow) and shellac the thing!
I need shellac advice. Specifically, what can I (should I) use? Can I just get shellac at the hardware store or....?
Re: Leather Bullwhip Build Log - Mod approved
Posted: Fri Aug 31, 2012 1:52 am
by Canuck Digger
Neat! Those knot look rather Australian to my eye, but well done!
Yes, you can get shellac from the store, but two things: 1-get some thinner just in case, 2-always test it on a scrap piece of leather first.
Also, never put thick coats of it, always thin ones. A coat that is too thick or not diluted enough will crack when the whip bends. So test it out.
You can also buy the natural shellac flakes and do it that way. I personally prefer it to the store stuff, but that's just me. I use something like 300 gr. in 1.5-1.75 L of methyl spirit (denatured alcohol @ 90% ). With the natural stuff, get the lightest color you can, so it doesn't tint the leather too much.
I apply it with a pad made of two layers of clean cotton wrapped around some wadding (it could be store-bought wadding or pieces of an old but clean t-shirt, or even that one sock that has a hole in it!). I put a little bit of the mixed solution in a smaller jar with a screw-on lid and dip the pad in that instead of always opening up the main shellac jar, which would contribute to premature evaporation of the alcohol...
I don't know about the store shellac, but the natural stuff has a shelf life, so always test it whenever you are about to use it on a scrap of leather. It should be fairly thin but not so thin as to be mostly alcohol. If it dries white, it's probably that there was too much humidity when drying (from the air) so just quickly run an alcohol-imbedded cloth over the whip and this will help it unlock the humidity and make it transparent again.
Don't shellac the fall, though you may shellac the fall hitch if you wish. I tie the whip horizontally from the fall and the wrist loop and start at the handle and work my way to the tip with the pad. I do two very thin coats of shellac on the whip and three on the butt end of the handle. make sure it is properly dried before you coil it as shellac can take a bit of time to properly cure and you wouldn't want the coils to stick together which would ruin the job and force you to start over again. If you can't leave it as it is, horizontally I mean, then hang it up vertically but make sure no part that was shellacked touches the ground (don't want it sticking to the floor any more than itself and there's the question of dust sticking to it on the floor...) OR if you MUST coil it, rub a teeny tinny bit of grease over it so it doesn't stick to itself. Leave for a day to cure.
Cheers,
Franco
Re: Leather Bullwhip Build Log - Mod approved
Posted: Fri Aug 31, 2012 1:55 am
by folkprophet
Canuck Digger wrote:Neat! Those knot look rather Australian to my eye, but well done!
Not sure what that means. Could you explain?
Re: Leather Bullwhip Build Log - Mod approved
Posted: Fri Aug 31, 2012 2:02 am
by Canuck Digger
Ig you look at multiple Australian whipmakers work, you'll notice that some of their end knots are more subdued, not raised as much from the handle. Not all of them of course, but some and that is what this makes me think of.


