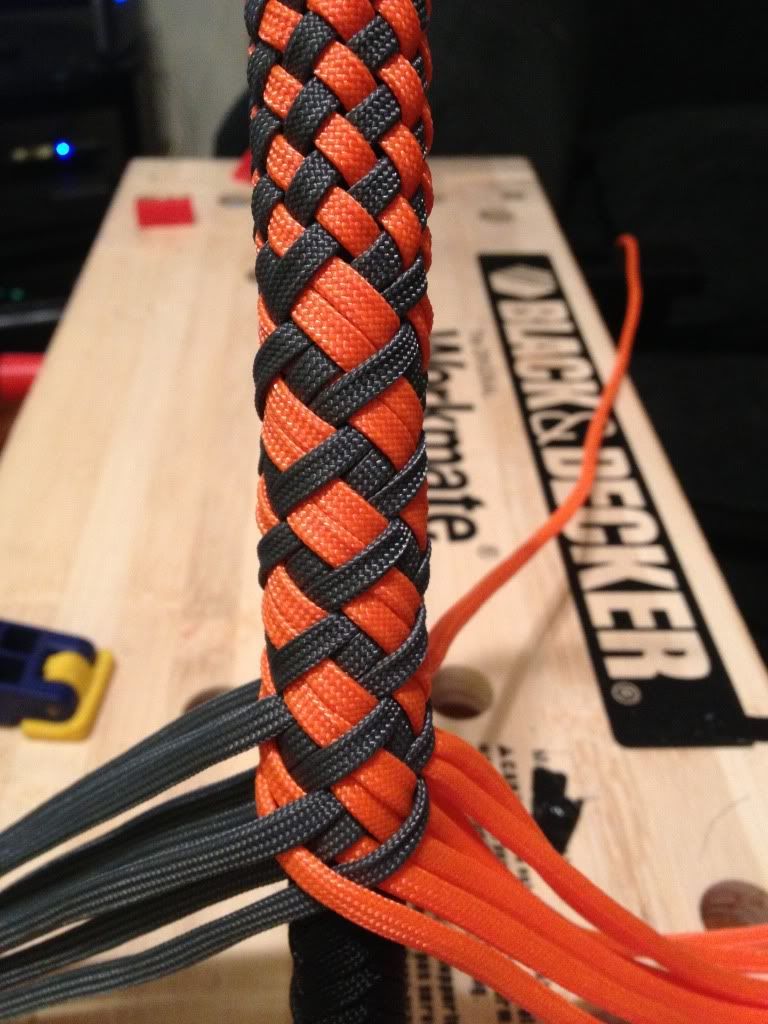
I have been experimenting with different 16 plait patterns on the handle of my second whip..I know for the really fancy plaiting most people wrap the solid color and then use a lacing needle to weave in patterns.
But could anyone help me with 16 plait patterns in the traditional style that utilize actual under over braiding? (so I can work these patterns in at ANY point in the whip)
I will most likely end up just doing double diamonds or single diamonds into herringbone but I'd like to do others..
I would like to learn thing's like the bird's eye pattern etc..and eventually make something like this.
http://www.bullwhips.info/bullpics/2661-bullwhip.jpg" onclick="window.open(this.href);return false;
Yes I know this is an insanely impressive whip by Bernie!^^
Nylon para cord bullwhip handle plaiting
Moderator: BullWhipBorton
-
Blake Bruning
- Vendor
- Posts: 171
- Joined: Thu Sep 22, 2011 12:35 pm
Re: Nylon para cord bullwhip handle plaiting
you need to buy Ron Edwards books. I forget the name off hand but something like "whips and whip braiding"
Re: Nylon para cord bullwhip handle plaiting
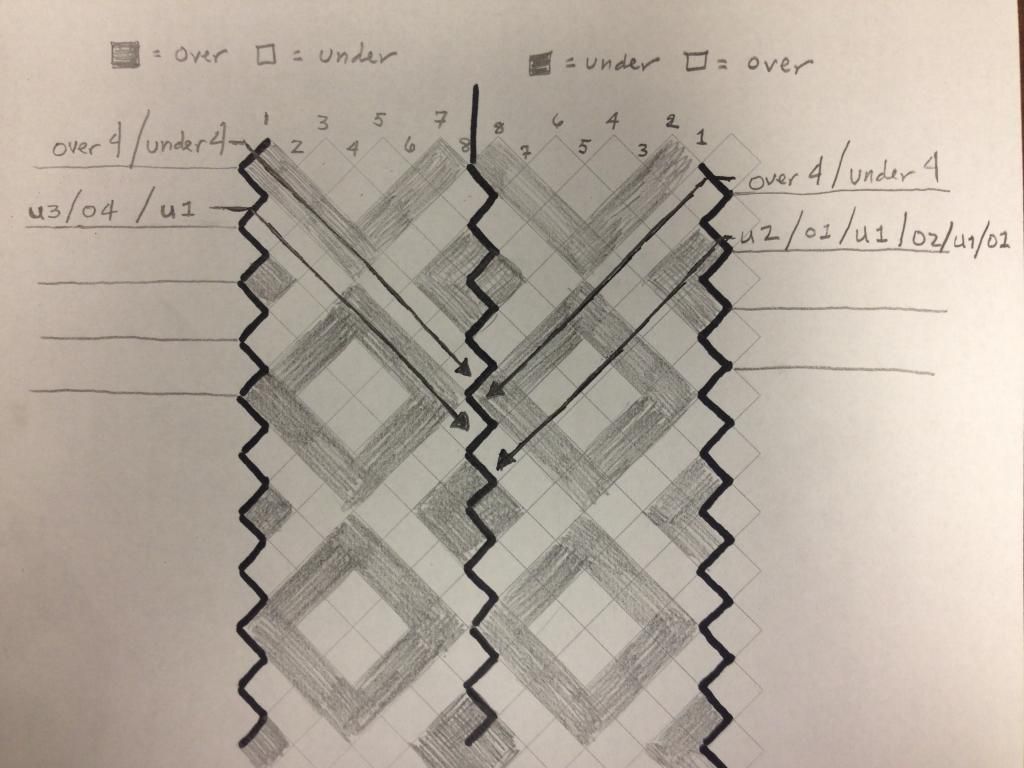
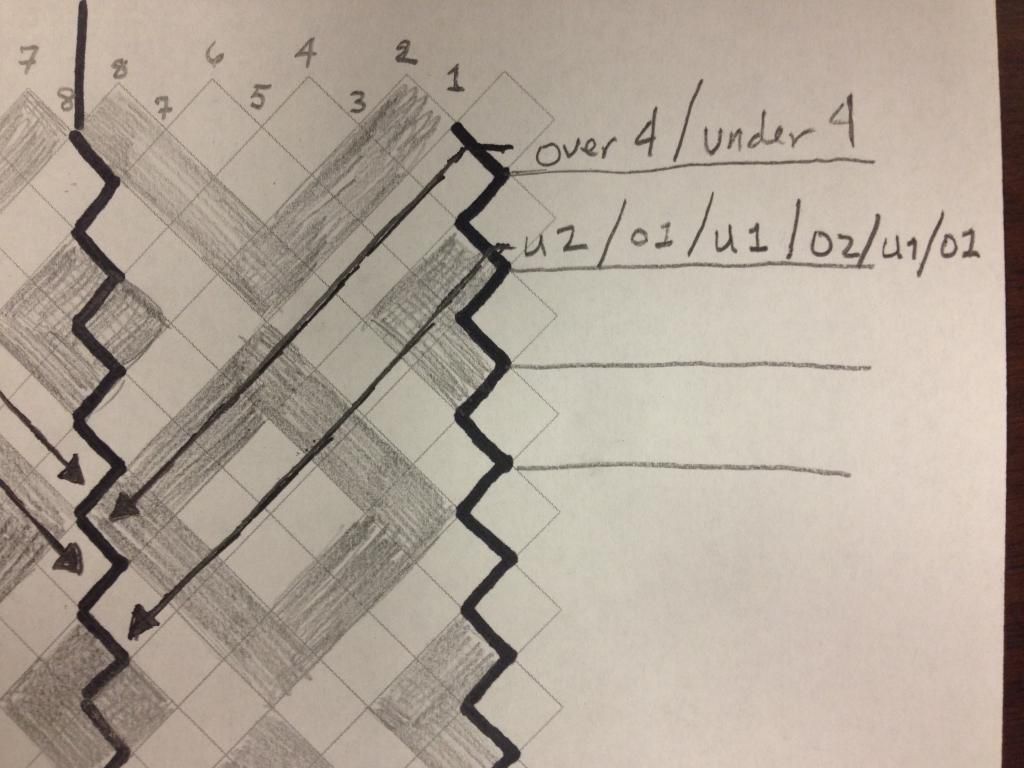
The easiest method I've found is to draw patterns out on a grid. Once drawn out, you can work out the over/under sequence by counting down the diagonal. Since it's hard to explain, I've included a couple of pics:

This image would be for a 16 plait, 2-color pattern -- at the top I've labeled it out for the 8 strands per side, with a dividing line running down the middle. Running the line down the middle just helps you to know when to stop counting out your pattern.
As with regular plaiting, whatever color is "over" on one side, will be "under" on the opposite -- so if I'm going "over" black on the left side, I'll be going "under" black on the right.

You count out your over/under sequence diagonal down the grid pattern.
Even if the sequence is complex, as with the second line in the above image, this makes it pretty easy to keep track of what to do.
You can print out your own grids, perfect for plaiting design, from this site:
http://incompetech.com/graphpaper/axonometric/" onclick="window.open(this.href);return false;
Just make sure to uncheck the boxes for the vertical and horizontal lines. You might have to experiment with grid and border sizes depending on the size of paper you want to print to.
I can't take credit for inventing this technique (and I'm not sure where I first saw it), but it has helped me tremendously...


This image would be for a 16 plait, 2-color pattern -- at the top I've labeled it out for the 8 strands per side, with a dividing line running down the middle. Running the line down the middle just helps you to know when to stop counting out your pattern.
As with regular plaiting, whatever color is "over" on one side, will be "under" on the opposite -- so if I'm going "over" black on the left side, I'll be going "under" black on the right.

You count out your over/under sequence diagonal down the grid pattern.
Even if the sequence is complex, as with the second line in the above image, this makes it pretty easy to keep track of what to do.
You can print out your own grids, perfect for plaiting design, from this site:
http://incompetech.com/graphpaper/axonometric/" onclick="window.open(this.href);return false;
Just make sure to uncheck the boxes for the vertical and horizontal lines. You might have to experiment with grid and border sizes depending on the size of paper you want to print to.
I can't take credit for inventing this technique (and I'm not sure where I first saw it), but it has helped me tremendously...

Re: Nylon para cord bullwhip handle plaiting
Awesome that is exactly what I was looking for..this kind of info is extremely hard to find on the web. Bernie46 has a similar video on youtube but he does the wrap method. The way you explained it makes sense now.


