From falls & poppers to plaiting & cracking technique, this section is dedicated in memory of Sergei, IndyGear Staff Member and Whip Guru. Always remember to keep "Celebratin' Life!"
Canuck Digger wrote:Ig you look at multiple Australian whipmakers work, you'll notice that some of their end knots are more subdued, not raised as much from the handle. Not all of them of course, but some and that is what this makes me think of.
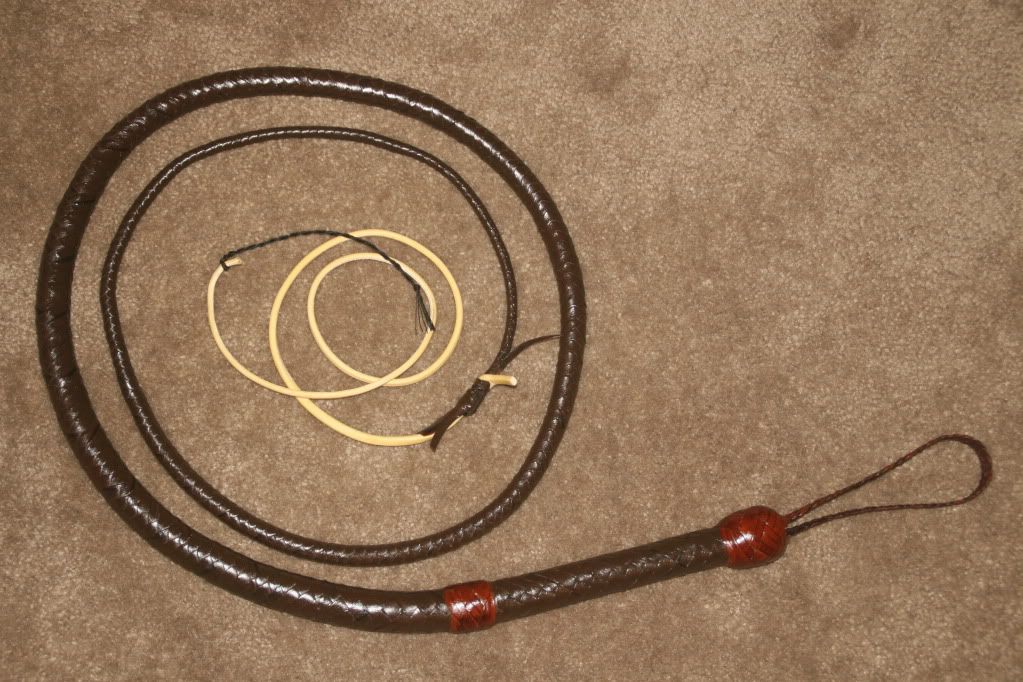
That was my assumption of what you meant. In this case, I think it comes from the fact that the handle itself is thicker, and so if I made the knot relatively bigger it would have been huge! If I had a 21-23" mm handle it would have looked better. Let's see... (measuring................)
..............hmm... so 1.53" x 1.58". So yeah, I got it rather small. 'sokay for this one. I didn't use lead because, if you recall, I started this whip with a lead shot core. Thought it probably didn't need the extra weight beyond that.
riku1914 wrote:I said it was easily adapted because that's all I knew how to do before I did ANYTHING whip making related, was a flat 3 strand braid. What I knew from that I adapted easily to a 4 and 5 plait, then when I realized I couldn't make whips with that, set out to learn round plaits.
I think it's funny how different brains can adapt so differently. So what I had done on that other pattern is braided the outside strand through all 5 of the other strands to become the outside strand on the other side, and so forth, rather than braiding the outside strands to the middle, as per the "proper" method.
Canuck Digger wrote:If it makes you feel any better I think I did the same thing my first time...
Yeah. I don't feel too bad. The point of trying to do an Indy style whip was for the practice because that's what I'd like to make ultimately. But for this whip (which is for a guy who's covering the cost of materials) it doesn't matter as far as that goes. His specifications for design were, "Not too light" and, "Surprise me". I did not measure the foundation before tying the knot. If I had, I could have built it up more, etc. But I wasn't that worried about it.
Canuck Digger wrote:Neat! Those knot look rather Australian to my eye, but well done!
Yes, you can get shellac from the store, but two things: 1-get some thinner just in case, 2-always test it on a scrap piece of leather first.
Also, never put thick coats of it, always thin ones. A coat that is too thick or not diluted enough will crack when the whip bends. So test it out.
You can also buy the natural shellac flakes and do it that way. I personally prefer it to the store stuff, but that's just me. I use something like 300 gr. in 1.5-1.75 L of methyl spirit (denatured alcohol @ 90% ). With the natural stuff, get the lightest color you can, so it doesn't tint the leather too much.
I apply it with a pad made of two layers of clean cotton wrapped around some wadding (it could be store-bought wadding or pieces of an old but clean t-shirt, or even that one sock that has a hole in it!). I put a little bit of the mixed solution in a smaller jar with a screw-on lid and dip the pad in that instead of always opening up the main shellac jar, which would contribute to premature evaporation of the alcohol...
I don't know about the store shellac, but the natural stuff has a shelf life, so always test it whenever you are about to use it on a scrap of leather. It should be fairly thin but not so thin as to be mostly alcohol. If it dries white, it's probably that there was too much humidity when drying (from the air) so just quickly run an alcohol-imbedded cloth over the whip and this will help it unlock the humidity and make it transparent again.
Don't shellac the fall, though you may shellac the fall hitch if you wish. I tie the whip horizontally from the fall and the wrist loop and start at the handle and work my way to the tip with the pad. I do two very thin coats of shellac on the whip and three on the butt end of the handle. make sure it is properly dried before you coil it as shellac can take a bit of time to properly cure and you wouldn't want the coils to stick together which would ruin the job and force you to start over again. If you can't leave it as it is, horizontally I mean, then hang it up vertically but make sure no part that was shellacked touches the ground (don't want it sticking to the floor any more than itself and there's the question of dust sticking to it on the floor...) OR if you MUST coil it, rub a teeny tinny bit of grease over it so it doesn't stick to itself. Leave for a day to cure.
Cheers,
Franco
Thought I read something about rolling it between coats too. And maybe something about applying leather conditioner between coats. ????
When applying shellac, I just give the whole whip a coat, wait about 15 seconds, give it another coat, then repeat if necessary. I usually give the heel knot and first several inches of the handle extra shellac because it's handled more and the shellac and protect it from stains.
It turned out good for your first go with leather. One suggestion, twist the cracker tighter and make the tassel longer. On my nylon crackers, I make the tassel 3.5 inches long.
Folkprophet, I've been quietly following this thread with interest, but have to chime in now. I started planning a whip project last fall, but never got started because it seemed to daunting, but after watching you so successfully attack and solve your problems I've been inspired to give it another try. I hope my first whip looks half as nice as yours.
ShanghaiJack wrote:Folkprophet, I've been quietly following this thread with interest, but have to chime in now. I started planning a whip project last fall, but never got started because it seemed to daunting, but after watching you so successfully attack and solve your problems I've been inspired to give it another try. I hope my first whip looks half as nice as yours.
Regards,
SJ
Awesome! I just have to warn you though. It's addicting! I've dug into my second one already and looking forward to trying to improve some of the mistakes from the first one. I have the leather for 4 more whips (I think) and just bought a big ol' slab o' cow hide for the bolsters. There are some daunting things about it (even after completing one) but it's just so much fun.
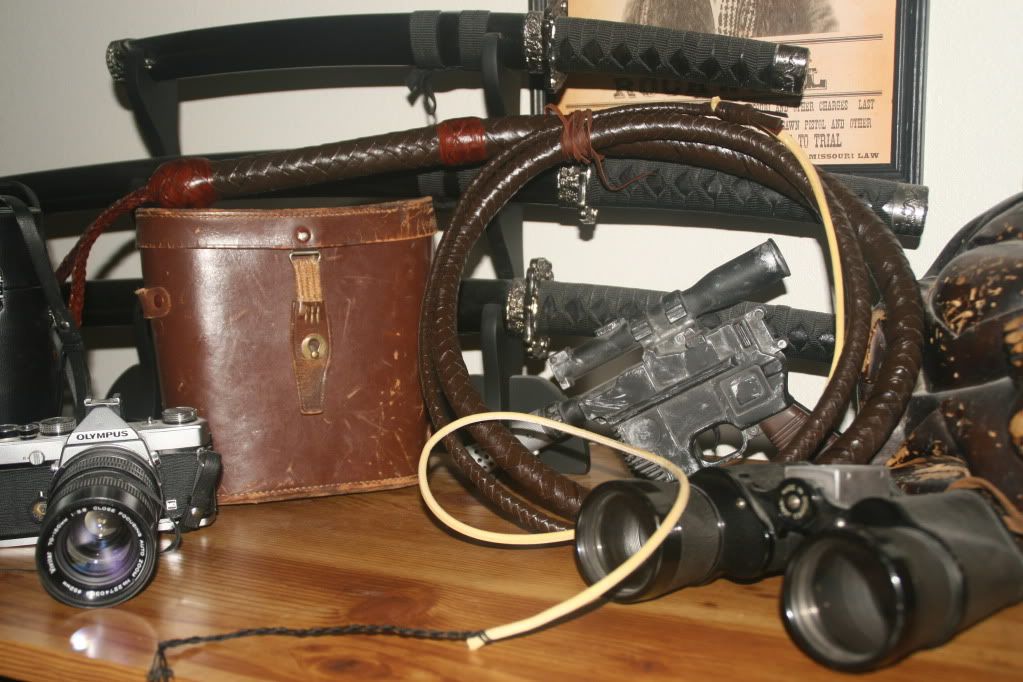
Will have some better pics of this whip later today.
Folkprophet, you did a great job figuring out the 6-stran flat braid!
Even though the shape of the TH knot isn't exactly "Indy" it seems very comfortable for the hand. As Franco wrote, it resembles the Australian practice of shaping knots. These are more discreet than the bulky knots found on American Style bullwhips.
riku1914 wrote:A good thing to "roll" a wrist loop is the back side a hook ( the side facing away from you when plaiting from one ). It works perfectly for me, and Aldo is the one that first brought it to my attention.
riku1914 wrote:A good thing to "roll" a wrist loop is the back side a hook ( the side facing away from you when plaiting from one ). It works perfectly for me, and Aldo is the one that first brought it to my attention.