


thanks to Dan, who sent me some pictures and a detailled drawing, I had the chance to built a target stand.
I'd like to give something back to all you guys and so I asked Dan what he thinks about posting the single
steps here. Well, he told me that these pics could be from interest to you. And so here they are.
I hope you like the pictures and what I made here.
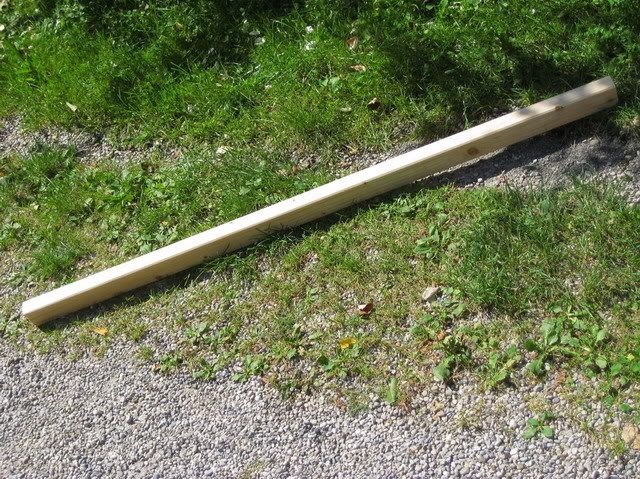
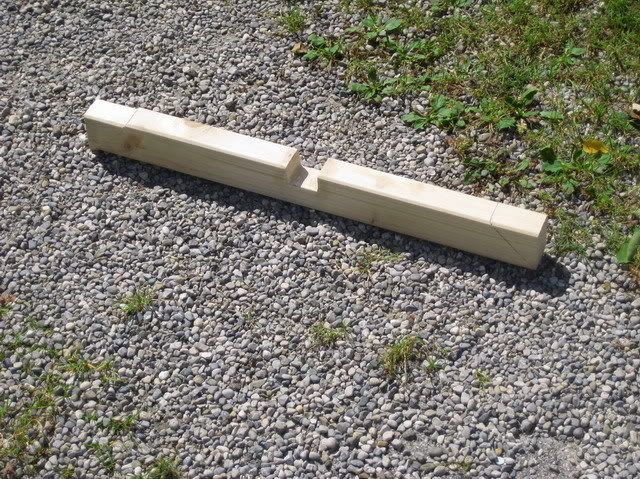
This is the beginning of all.
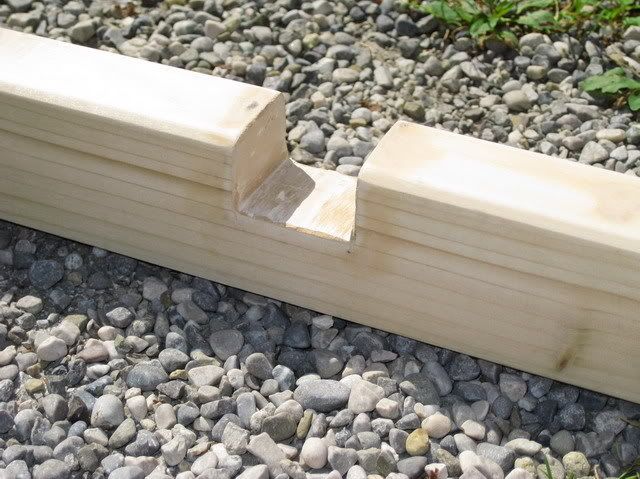
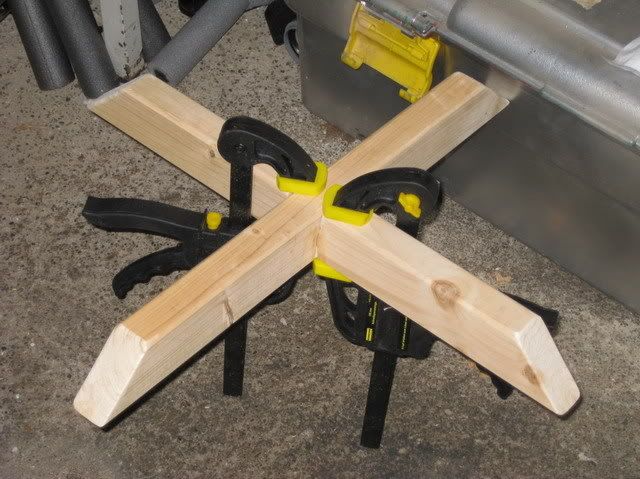
The pieces for the base are cut and the notches are made to bring both halfs together
http://img.photobucket.com/albums/v654/ ... get_02.jpg
http://img.photobucket.com/albums/v654/ ... get_04.jpg
http://img.photobucket.com/albums/v654/ ... get_07.jpg
http://img.photobucket.com/albums/v654/ ... get_08.jpg
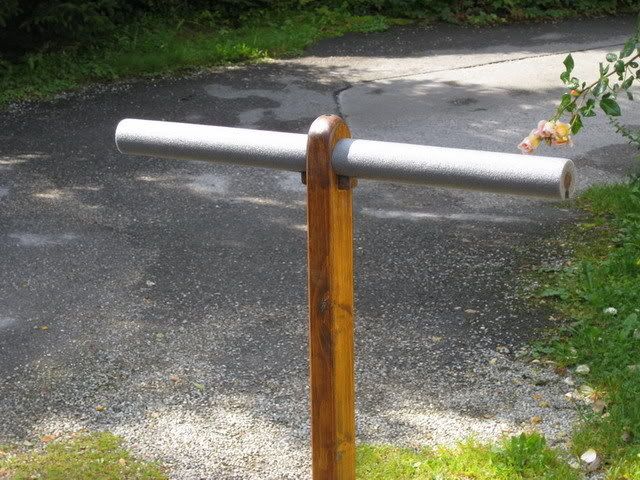
The stand itself gets rounded at the top and a hole (20mm) is drilled

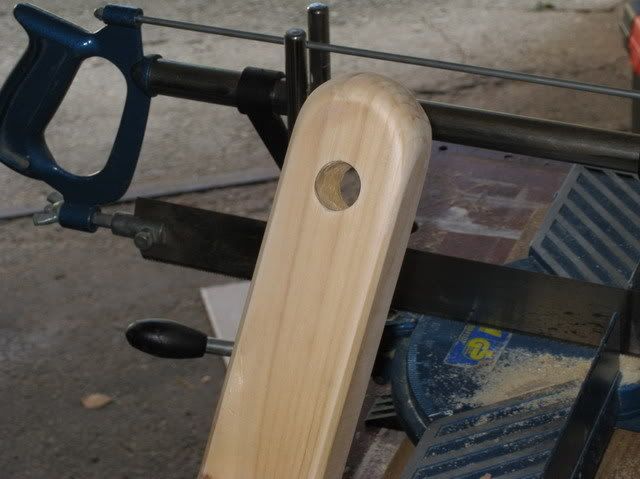
The rod - the targetholder - is glued to the pylon and fixed with along wood screw.
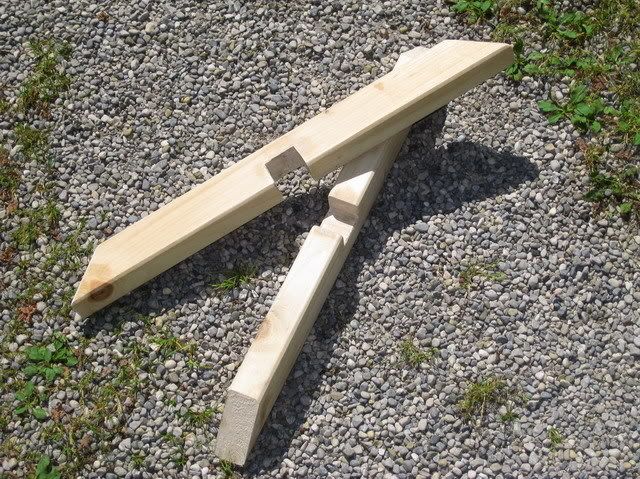
So are the parts of the x base, glued and fixed.
http://img.photobucket.com/albums/v654/ ... get_12.jpg
http://img.photobucket.com/albums/v654/ ... get_15.jpg
Here you have the two parts that form the stand. They are protected with wood stain,
so there's no problem if you forget it in the rain.
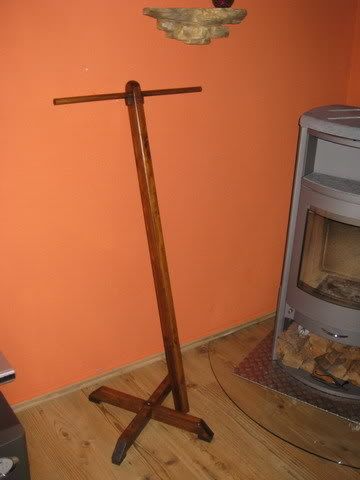
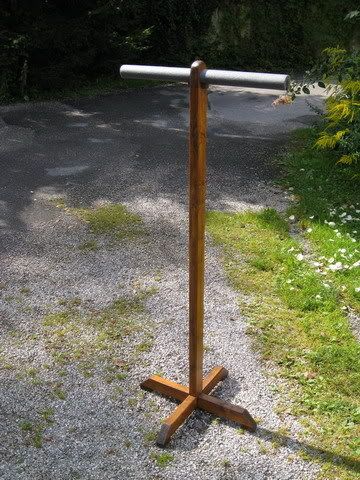
And here it is.
http://img.photobucket.com/albums/v654/ ... get_22.jpg
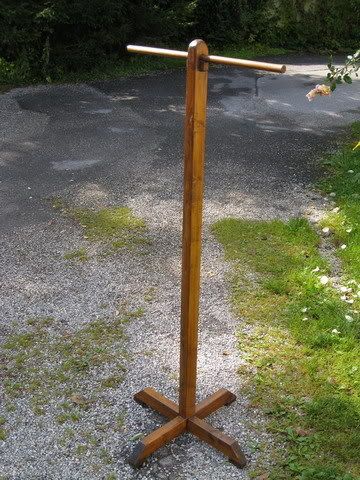
For the whip's safety there is a foam pipe, if the whip hits the wooden rod.
If this is damaged, just replace it, no problem.
http://img.photobucket.com/albums/v654/ ... get_23.jpg
It took me just one weekend and it was a lot of fun to build it. Perhaps you do the same now
Thanks again to Dan - without his help there would be no target stand.
Please enjoy the pictures and let me know what you think.
Bob


